> ## Documentation Index
> Fetch the complete documentation index at: https://docs.levelblue.com/llms.txt
> Use this file to discover all available pages before exploring further.
# Objects
### Viewing Firewall Objects
To view a **firewall object**, a firewall asset must be selected. Once this is done, you can click on the **Objects tab** of the **Manage** page, which provides the capability to view the **firewall objects** for the selected asset.
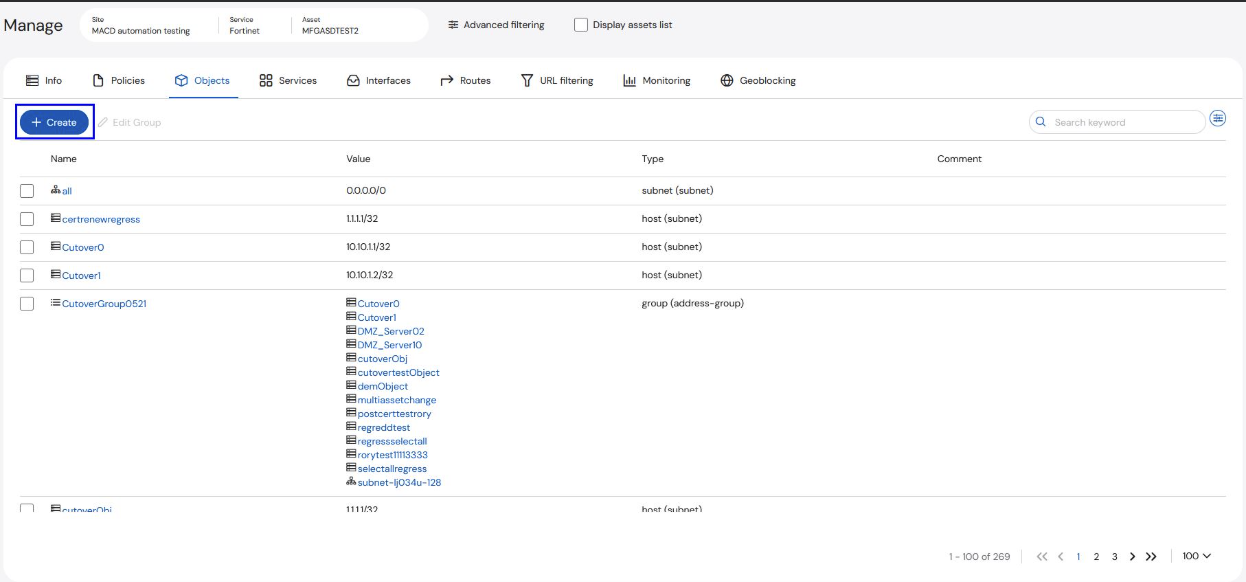 The default view will display all the firewall objects sorted by **Name**. You can sort the table by a different field by clicking on column headers (**Name**/**Value**/**Type**). The slider on the right side allows you to select the fields you would like to view in the display of the firewall rules.
To view more details about the object, select the object name and the information will pop up.
The default view will display all the firewall objects sorted by **Name**. You can sort the table by a different field by clicking on column headers (**Name**/**Value**/**Type**). The slider on the right side allows you to select the fields you would like to view in the display of the firewall rules.
To view more details about the object, select the object name and the information will pop up.
 ### Editing Groups
A user can edit a **Group** by clicking on the box at the left of the entry to activate the **Edit Group** button for the selected object.
**To edit a group:**
1. Select the checkbox of the group to be modified.
2. Click **Edit Group**. The **Create or Modify Group** form opens.
The selected object must be a **Group**; otherwise, the **Edit Group** button will not be available.
3. Enter the required information: **Assets**, **Business Justification**, **Implementation Time**, **Internal Ticket Number** (optional), and **Additional Emails** (optional).
### Editing Groups
A user can edit a **Group** by clicking on the box at the left of the entry to activate the **Edit Group** button for the selected object.
**To edit a group:**
1. Select the checkbox of the group to be modified.
2. Click **Edit Group**. The **Create or Modify Group** form opens.
The selected object must be a **Group**; otherwise, the **Edit Group** button will not be available.
3. Enter the required information: **Assets**, **Business Justification**, **Implementation Time**, **Internal Ticket Number** (optional), and **Additional Emails** (optional).
 4. Enter the **Name**, **Type**, and **Comments** (optional) on the **Request** section.
5. Select the applicable **Objects and Groups** from the **Available Objects and Groups** (left side).
6. Click the **>** icon to add your selections to the **Assigned Objects and Groups** section (right side).
Click the **\<** icon to move objects or groups out of the **Assigned Objects and Groups** section.
7. Click **Submit**.
### Creating Groups or Objects
You can create a new **Group** or **Object** from the **Objects** page.
**To create a group or object:**
1. Click **+Create**.
2. Select from the drop-down menu: **New Group from the selection**, **New Group**, or **New Object**.
4. Enter the **Name**, **Type**, and **Comments** (optional) on the **Request** section.
5. Select the applicable **Objects and Groups** from the **Available Objects and Groups** (left side).
6. Click the **>** icon to add your selections to the **Assigned Objects and Groups** section (right side).
Click the **\<** icon to move objects or groups out of the **Assigned Objects and Groups** section.
7. Click **Submit**.
### Creating Groups or Objects
You can create a new **Group** or **Object** from the **Objects** page.
**To create a group or object:**
1. Click **+Create**.
2. Select from the drop-down menu: **New Group from the selection**, **New Group**, or **New Object**.
 To create a **New Group from selection**, one or more objects from the table must be selected.
* If you select **New Group**, you will be directed to the **Create or Modify Group** ticket page.
* If you select **New Object**, you will be directed to the **Access Request** ticket page.
To create a **New Group from selection**, one or more objects from the table must be selected.
* If you select **New Group**, you will be directed to the **Create or Modify Group** ticket page.
* If you select **New Object**, you will be directed to the **Access Request** ticket page.