> ## Documentation Index
> Fetch the complete documentation index at: https://docs.levelblue.com/llms.txt
> Use this file to discover all available pages before exploring further.
# Configuring the BlueApp for McAfee ePO
The BlueApp for McAfee ePO connects to the Microsoft SQL database within your McAfee ePolicy Orchestrator (ePO) to retrieve and ingest data for analysis in USM Anywhere. After USM Anywhere analyzes the first of these events, the [McAfee ePO dashboard](../../user-guide/dashboards/mcafeeepo) is available.
## Requirements
To configure the BlueApp for McAfee ePO, you must add a scheduled job in USM Anywhere that collects data directly from the SQL database in your McAfee ePO. Before you do this, there is information about your database that is required to make the connection:
* Hostname or IP address of the SQL database
* Port number (usually 1433) that is open for the connection
* The database name
* Username and password used to log in to the SQL database
**Important:** This is the Microsoft SQL Server account and not the Microsoft Windows user account. The BlueApp for McAfee ePO uses SQL Server authentication over Windows Authentication.
* User account has read permission for the EPOEvents table
## Creating a Scheduler Job for McAfee ePO
The BlueApp for McAfee ePO page provides easy access to define a new log collection job to retrieve your McAfee ePO event data. After you create the new job, you can make changes to the parameters for the scheduled job or review its history in the Scheduler page. See USM Anywhere Scheduler for more information about working with scheduled jobs.
**Note:** Unlike other apps, the McAfee ePO app allows multiple scheduler jobs to be configured to run against the same sensor.
**To schedule a McAfee ePO job**
1. In USM Anywhere, go to **Data Sources > BlueApps**.
2. Click the **Available Apps** tab.
3. Search for the BlueApp, and then click the tile.
4. Click the **Scheduling** tab.
5. Enable an existing job or click **New Job**.
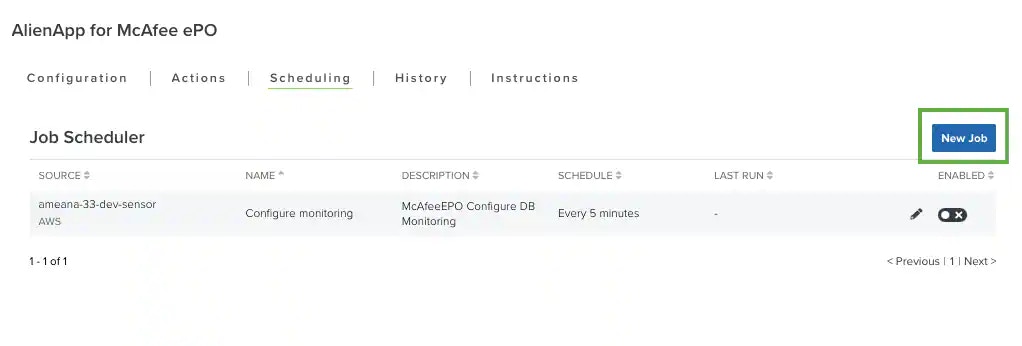 If you click **New Job**, the Schedule New Job dialog box opens with the options defined for an BlueApp for McAfee ePO job.
6. Enter the name and description for the job.
The description is optional, but it is a best practice to provide this information so that others can easily understand what it does.
If you click **New Job**, the Schedule New Job dialog box opens with the options defined for an BlueApp for McAfee ePO job.
6. Enter the name and description for the job.
The description is optional, but it is a best practice to provide this information so that others can easily understand what it does.
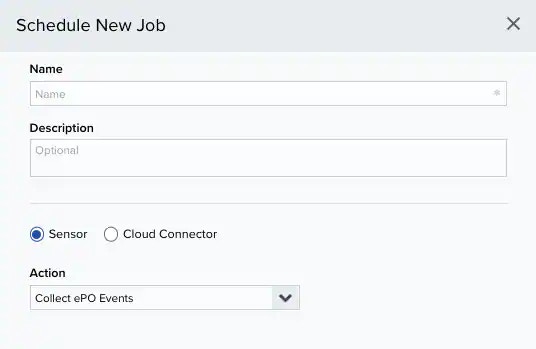 7. Select **Sensor** as the source for your new job.
8. Select an Action from the dropdown menu.
* **Collect ePO Events**: Schedules one job to collect ePO events from the sensor.
* \*\*Configure monitoring (not encrypted): \*\*Schedules multiple jobs each monitoring one database.
9. If you selected *Collect ePO Events*, complete the following configuration steps:
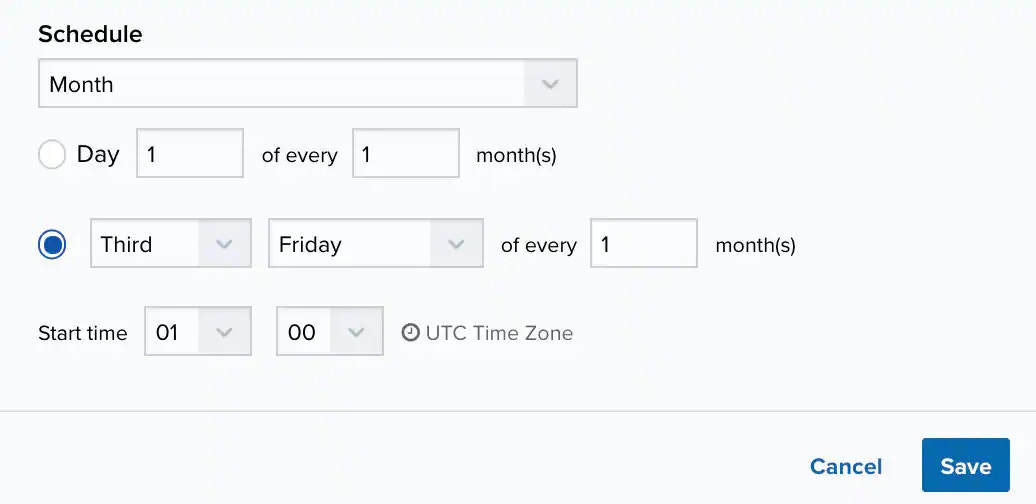
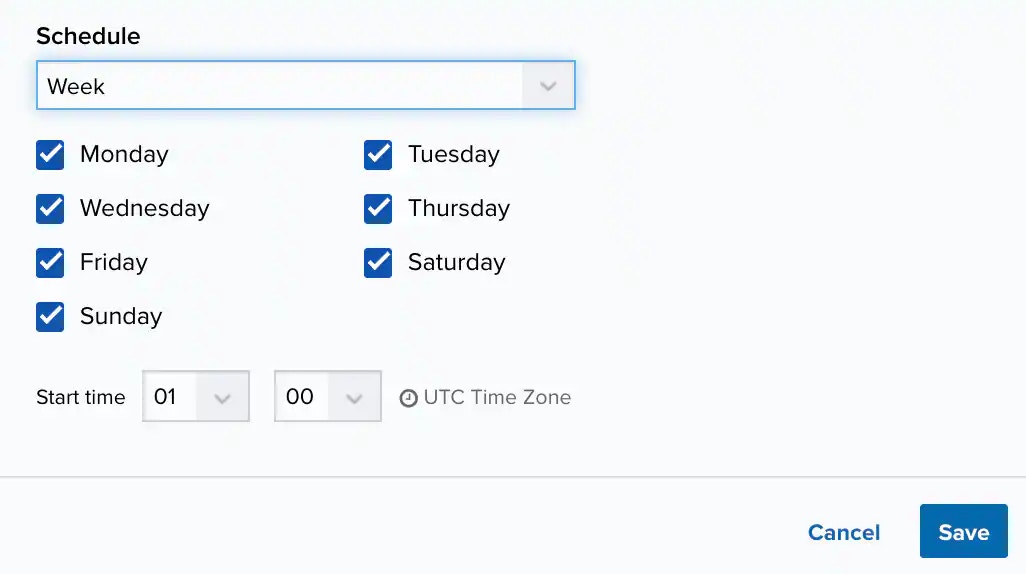
1. In the Schedule section, specify when USM Anywhere runs the job:
a.Select the increment as **Minute**, **Hour**, **Day**, **Week**, **Month**, or **Year**.
**Warning:** After a frequency change, monitor the system to check its performance. For example, you can check the system load and CPU. See [USM Anywhere System Monitor](../../user-guide/system-status/system-monitor) for more information.
b. Set the interval options for the increment.
The selected increment determines the available options. For example, on a weekly increment, you can select the days of the week to run the job.
7. Select **Sensor** as the source for your new job.
8. Select an Action from the dropdown menu.
* **Collect ePO Events**: Schedules one job to collect ePO events from the sensor.
* \*\*Configure monitoring (not encrypted): \*\*Schedules multiple jobs each monitoring one database.
9. If you selected *Collect ePO Events*, complete the following configuration steps:
1. In the Schedule section, specify when USM Anywhere runs the job:
a.Select the increment as **Minute**, **Hour**, **Day**, **Week**, **Month**, or **Year**.
**Warning:** After a frequency change, monitor the system to check its performance. For example, you can check the system load and CPU. See [USM Anywhere System Monitor](../../user-guide/system-status/system-monitor) for more information.
b. Set the interval options for the increment.
The selected increment determines the available options. For example, on a weekly increment, you can select the days of the week to run the job.
 **Important:** USM Anywhere restarts the schedule on the first day of the month if the option "Every x days" is selected.
c. Set the start time.
This is the time that the job starts at the specified interval. It uses the time zone configured for your USM Anywhere instance (the default is Coordinated Universal Time \[UTC]).
2. Click Save to save your new scheduled job.
10. If you selected *Configure Monitoring*, complete the following configuration steps for each individual database you wish to monitor:
**Warning:** If you select this action, the username and password you configure for the database will be stored and passed unencrypted.
1. Enter the McAfee ePO database connection information:
**Important:** USM Anywhere restarts the schedule on the first day of the month if the option "Every x days" is selected.
c. Set the start time.
This is the time that the job starts at the specified interval. It uses the time zone configured for your USM Anywhere instance (the default is Coordinated Universal Time \[UTC]).
2. Click Save to save your new scheduled job.
10. If you selected *Configure Monitoring*, complete the following configuration steps for each individual database you wish to monitor:
**Warning:** If you select this action, the username and password you configure for the database will be stored and passed unencrypted.
1. Enter the McAfee ePO database connection information:
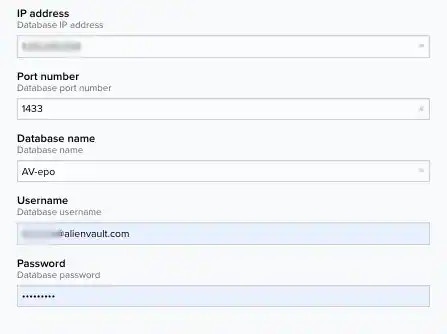 * In the IP address field, enter the IP address of the ePO server SQL database.
* In the Port number field, enter the port number on which the ePO server SQL database listens.
* In the Database name field, enter the name of the ePO server SQL database.
* In the Username and Password fields, enter the credentials you use to access the ePO server SQL database.
2. In the Schedule section, specify when USM Anywhere runs the job:
a. Select the increment as **Minute**, **Hour**, **Day**, **Week**, **Month**, or **Year**.
**Warning:** After a frequency change, monitor the system to check its performance. For example, you can check the system load and CPU. See [USM Anywhere System Monitor](../../user-guide/system-status/system-monitor) for more information.
b. Set the interval options for the increment.
The selected increment determines the available options. For example, on a weekly increment, you can select the days of the week to run the job.
* In the IP address field, enter the IP address of the ePO server SQL database.
* In the Port number field, enter the port number on which the ePO server SQL database listens.
* In the Database name field, enter the name of the ePO server SQL database.
* In the Username and Password fields, enter the credentials you use to access the ePO server SQL database.
2. In the Schedule section, specify when USM Anywhere runs the job:
a. Select the increment as **Minute**, **Hour**, **Day**, **Week**, **Month**, or **Year**.
**Warning:** After a frequency change, monitor the system to check its performance. For example, you can check the system load and CPU. See [USM Anywhere System Monitor](../../user-guide/system-status/system-monitor) for more information.
b. Set the interval options for the increment.
The selected increment determines the available options. For example, on a weekly increment, you can select the days of the week to run the job.
 Or on a monthly increment, you can specify a date or a day of the week that occurs within the month.
Important: USM Anywhere restarts the schedule on the first day of the month if the option "Every x days" is selected.
c. Set the start time.
This is the time that the job starts at the specified interval. It uses the time zone configured for your USM Anywhere instance (the default is Coordinated Universal Time \[UTC]).
3. Click **Save**.
After the scheduled job runs, you should start seeing new events in USM Anywhere originating from the ePO server SQL database.
Or on a monthly increment, you can specify a date or a day of the week that occurs within the month.
Important: USM Anywhere restarts the schedule on the first day of the month if the option "Every x days" is selected.
c. Set the start time.
This is the time that the job starts at the specified interval. It uses the time zone configured for your USM Anywhere instance (the default is Coordinated Universal Time \[UTC]).
3. Click **Save**.
After the scheduled job runs, you should start seeing new events in USM Anywhere originating from the ePO server SQL database.