> ## Documentation Index
> Fetch the complete documentation index at: https://docs.levelblue.com/llms.txt
> Use this file to discover all available pages before exploring further.
# Uploading AWS CloudFormation Templates
Through USM Anywhere you can generate the Amazon Web Service (AWS) CloudFormation templates that you need to begin gathering data from your Amazon Simple Storage Service (S3) buckets or AWS Inventory. See [Downloading an Existing AWS Cloud Connector Template](/documentation/usm-anywhere/user-guide/cloud-connector/aws/downloading-template) for more information.
**To upload an AWS CloudFormation template**
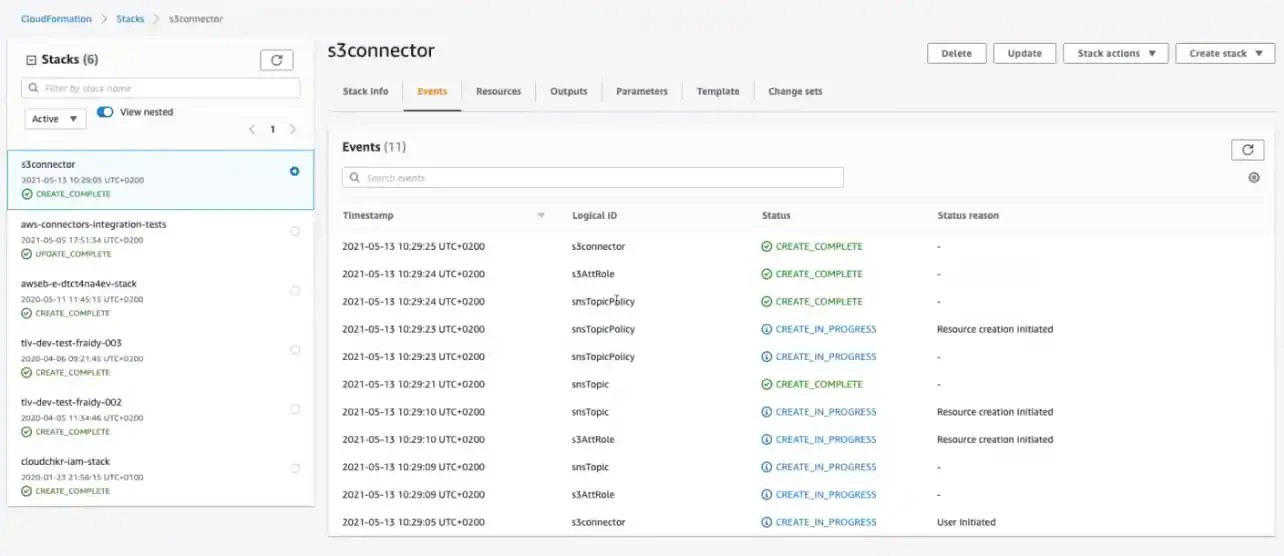
1. Open your **AWS Management Console** page, and then go to **CloudFormation**.
2. Click **Create Stack > With new resources (standard).**
3. Select **Upload a Template File**, and then click **Choose File** to select the template you have downloaded from USM Anywhere.
 4. Click **Next**.
5. In the **Stack Name** text box, enter a name for your stack.
6. Use the **bucketArns** field to enter the Amazon S3 buckets' names where you currently store security logs.
This step is not required when uploading a template for AWS Inventory.
There are two options:
* Enter the existing Amazon S3 bucket Amazon Resource Names (ARNs) that contain the logs you would like to monitor. You can enter several ARNs separated by commas.
**Important:** If you choose this option, you must enable the event notifications. See [To enable the event notifications for Amazon S3 buckets you have selected](uploading-cloud-formation-template) for more information.
* Leave this field empty and a new Amazon S3 bucket will be automatically created.
4. Click **Next**.
5. In the **Stack Name** text box, enter a name for your stack.
6. Use the **bucketArns** field to enter the Amazon S3 buckets' names where you currently store security logs.
This step is not required when uploading a template for AWS Inventory.
There are two options:
* Enter the existing Amazon S3 bucket Amazon Resource Names (ARNs) that contain the logs you would like to monitor. You can enter several ARNs separated by commas.
**Important:** If you choose this option, you must enable the event notifications. See [To enable the event notifications for Amazon S3 buckets you have selected](uploading-cloud-formation-template) for more information.
* Leave this field empty and a new Amazon S3 bucket will be automatically created.
 **Note:** If you later decide to enter new or additional Amazon S3 buckets, you can return to this page and add them.
7. Click **Next**.
8. **(OPTIONAL)** If your organization requires tags, you may enter them at this point. You can also leave them blank.
9. Click **I Acknowledge that AWS CloudFormation Might Create IAM Resources with Custom Names**.
10. Click **Create Stack**.
**Note:** If you later decide to enter new or additional Amazon S3 buckets, you can return to this page and add them.
7. Click **Next**.
8. **(OPTIONAL)** If your organization requires tags, you may enter them at this point. You can also leave them blank.
9. Click **I Acknowledge that AWS CloudFormation Might Create IAM Resources with Custom Names**.
10. Click **Create Stack**.
 **To enable the event notifications for Amazon S3 buckets you have selected**
**Important:** You must enable event notifications if you have entered your Amazon S3 bucket ARNs in the **bucketArns** field. If you left this field empty, it is not necessary to enable the event notifications. If you do not follow these instructions, USM Anywhere will not receive events from your Amazon S3 buckets.
1. Open your **AWS Management Console** page, and then go to **CloudFormation**.
2. Select the buckets you entered previously in the bucketArns field.
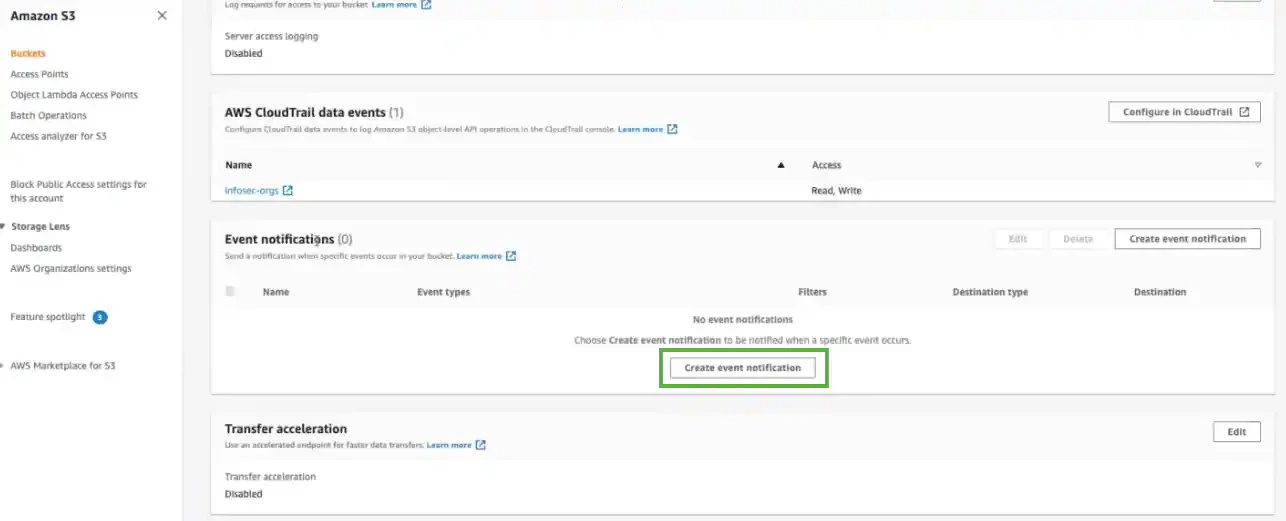
3. Click the **Properties** tab.
4. Click **Create Event Notification** to enable the event notifications.
**To enable the event notifications for Amazon S3 buckets you have selected**
**Important:** You must enable event notifications if you have entered your Amazon S3 bucket ARNs in the **bucketArns** field. If you left this field empty, it is not necessary to enable the event notifications. If you do not follow these instructions, USM Anywhere will not receive events from your Amazon S3 buckets.
1. Open your **AWS Management Console** page, and then go to **CloudFormation**.
2. Select the buckets you entered previously in the bucketArns field.
3. Click the **Properties** tab.
4. Click **Create Event Notification** to enable the event notifications.
 5. In the **General Configuration** section, enter an **Event Name**.
6. In the **Event Types** section, select the **All Object Create Events** option.
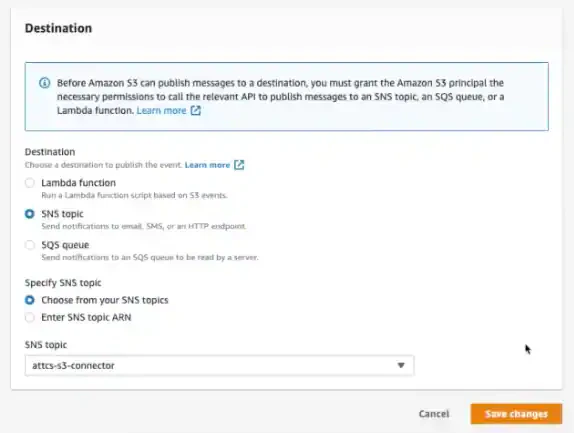
7. In the **Destination** section, select the **SNS Topic** option, and **Choose from Your SNS Topics**. In the **SNS Topic** drop-down list, select **attcs-s3-connector**.
5. In the **General Configuration** section, enter an **Event Name**.
6. In the **Event Types** section, select the **All Object Create Events** option.
7. In the **Destination** section, select the **SNS Topic** option, and **Choose from Your SNS Topics**. In the **SNS Topic** drop-down list, select **attcs-s3-connector**.
 8. Click **Save Changes**.
9. Go to USM Anywhere to enable the AWS Cloud Connector.
See [Cloud Connector List View](/documentation/usm-anywhere/user-guide/cloud-connector/aws/aws-cc-list-view) for more information.
8. Click **Save Changes**.
9. Go to USM Anywhere to enable the AWS Cloud Connector.
See [Cloud Connector List View](/documentation/usm-anywhere/user-guide/cloud-connector/aws/aws-cc-list-view) for more information.