> ## Documentation Index
> Fetch the complete documentation index at: https://docs.levelblue.com/llms.txt
> Use this file to discover all available pages before exploring further.
# Set Up USM Anywhere on the Hyper-V Virtual Machine
There is some configuration required within the console of the sensor. After this initial configuration, you use the USM Anywhere web UI to further configure the sensor, and all other sensors that you connect to USM Anywhere.
Perform these initial configuration tasks on the Hyper-V virtual machine, using the USM Anywhere Sensor console.
## Change the Administrative Password and Keyboard Layout
Follow these instructions to change the administrative password and keyboard layout.
**To change the administrative password and keyboard layout**
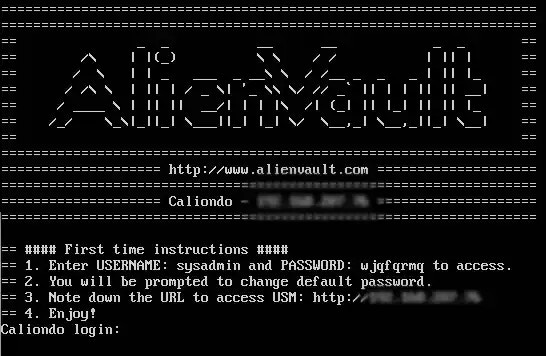
1. Log in using the credentials displayed in the console screen.
 2. (Optional) Configure the keyboard if you use a keyboard layout other than the U.S. default.
3. Set a new password for the sysadmin user.
**Important:** During the installation, your system acquires the initial IP address through Dynamic Host Configuration Protocol (DHCP). If DHCP is not enabled, you must configure it manually.
LevelBlue strongly recommends assigning a static IP address to the USM Anywhere Sensor as a best practice. This allows for proper log forwarding and network architecture.
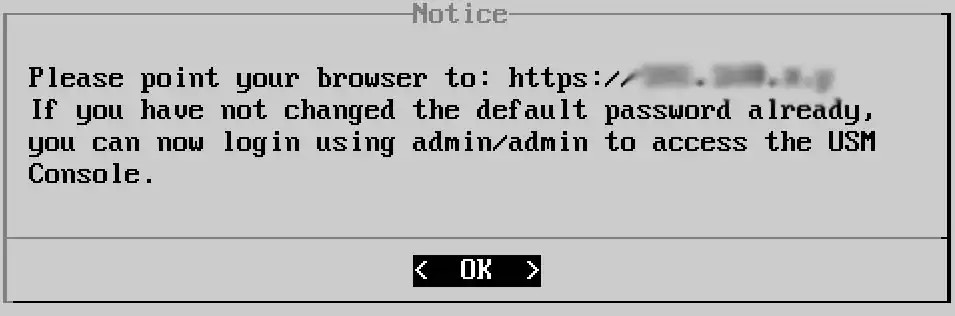
* If your system sets an IP address automatically, note the web URL (IP address). You will need the URL when you exit from the console and follow the instructions in [Connect the Hyper-V Sensor to USM Anywhere](hyperv-sensorsetup).
2. (Optional) Configure the keyboard if you use a keyboard layout other than the U.S. default.
3. Set a new password for the sysadmin user.
**Important:** During the installation, your system acquires the initial IP address through Dynamic Host Configuration Protocol (DHCP). If DHCP is not enabled, you must configure it manually.
LevelBlue strongly recommends assigning a static IP address to the USM Anywhere Sensor as a best practice. This allows for proper log forwarding and network architecture.
* If your system sets an IP address automatically, note the web URL (IP address). You will need the URL when you exit from the console and follow the instructions in [Connect the Hyper-V Sensor to USM Anywhere](hyperv-sensorsetup).
 * If your system does not set an IP address automatically, a message box confirms that the system was unable to acquire an IP address from a DHCP server after you change the sysadmin password.
* In this case, you must manually [set a static IP address](hyperv-vm-sensor) so that it remains unchanged in the future.
## Configure a Static IP Address
Follow these instructions to configure a static IP address.
**To configure a static IP address**
1. Go to **Network Configuration > Configure Management Interface > Set a Static Management IP Address**.
2. Enter the IP address, subnet, and gateway information in each screen.
3. Press **Enter**.
**Important:** DNS settings are not maintained when a static IP address is configured. If you configure a static IP address, you must configure the DNS network settings for successful sensor activation.
## Configure Domain Name System
Follow these instructions to configure the Domain Name System (DNS).
**Important:** When the USM Anywhere Sensor performs an asset scan, it must access the local Domain Name System (DNS) server to resolve local host names. The sensor uses reverse DNS to look up the hostname through the discovered IP address.
**Note:** When deploying your VMware Sensor in a DHCP environment, the DNS server is automatically set to retrieve via DHCP. This can be configured later in your sensor's settings. See [Deploying Your Sensor in a DHCP Environment](../setup/best-practices-dhcp) for more information about USM Anywhere Sensors in a DHCP environment.
**To configure DNS**
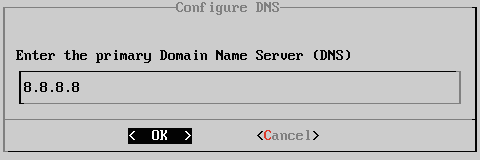
1. Go to Network Configuration > Configure DNS.
2. Enter the primary DNS and press Enter.
* If your system does not set an IP address automatically, a message box confirms that the system was unable to acquire an IP address from a DHCP server after you change the sysadmin password.
* In this case, you must manually [set a static IP address](hyperv-vm-sensor) so that it remains unchanged in the future.
## Configure a Static IP Address
Follow these instructions to configure a static IP address.
**To configure a static IP address**
1. Go to **Network Configuration > Configure Management Interface > Set a Static Management IP Address**.
2. Enter the IP address, subnet, and gateway information in each screen.
3. Press **Enter**.
**Important:** DNS settings are not maintained when a static IP address is configured. If you configure a static IP address, you must configure the DNS network settings for successful sensor activation.
## Configure Domain Name System
Follow these instructions to configure the Domain Name System (DNS).
**Important:** When the USM Anywhere Sensor performs an asset scan, it must access the local Domain Name System (DNS) server to resolve local host names. The sensor uses reverse DNS to look up the hostname through the discovered IP address.
**Note:** When deploying your VMware Sensor in a DHCP environment, the DNS server is automatically set to retrieve via DHCP. This can be configured later in your sensor's settings. See [Deploying Your Sensor in a DHCP Environment](../setup/best-practices-dhcp) for more information about USM Anywhere Sensors in a DHCP environment.
**To configure DNS**
1. Go to Network Configuration > Configure DNS.
2. Enter the primary DNS and press Enter.
 3. (Optional) Enter the secondary DNS and press **Enter**.
A text box opens to confirm that you want to apply changes.
4. Press **Enter**.
**Note:** Check your settings through **Network Configuration > View Network Configuration**.
See [Connect the Hyper-V Sensor to USM Anywhere](hyperv-sensorsetup).
3. (Optional) Enter the secondary DNS and press **Enter**.
A text box opens to confirm that you want to apply changes.
4. Press **Enter**.
**Note:** Check your settings through **Network Configuration > View Network Configuration**.
See [Connect the Hyper-V Sensor to USM Anywhere](hyperv-sensorsetup).