> ## Documentation Index
> Fetch the complete documentation index at: https://docs.levelblue.com/llms.txt
> Use this file to discover all available pages before exploring further.

# Configure Network Interfaces for On-Premises Sensors

A USM Anywhere Sensor deployed on VMware or Hyper-V uses five network interfaces. These network interfaces have a predefined role that cannot be changed. The USM Anywhere management interface is required for many essential functions, including the following:

* Connection to USM Anywhere
* Updates to the system
* Log collection within the monitored network
* <Tooltip tip="A known issue or weakness in a system, procedure, internal control, software package, or hardware that could be used to compromise security.">Vulnerability</Tooltip> scans
* <Tooltip tip="An IP-addressable host, including but not limited to network devices, virtual servers, and physical servers.">Asset</Tooltip> discovery

The management interface needs an IP address with permissions to access the following:

* Inbound packets containing <Tooltip tip="An industry standard message logging system that is used on many devices and platforms.">syslog</Tooltip> data sent from other hosts on that network
* Outbound connections made to perform <Tooltip tip="Authenticated scans are performed from inside the machine using a user account with appropriate privileges.">authenticated scans</Tooltip>

The other interfaces passively monitor network traffic in <Tooltip tip="Mode in which network IDS monitoring operates in passive listening mode, checking all IP packet traffic passing through it for threats.">promiscuous mode</Tooltip>; the system does allow the configuration of an IP address on them. These interfaces should be plugged into a port in the switch where [port mirroring](https://en.wikipedia.org/wiki/Port_mirroring) is configured. The following table summarizes each interface's usage.

**Network Interfaces Available in On-Premises Sensors**

<table>
  <thead>
    <tr>
      <th>Network Configuration Required</th>
    </tr>
  </thead>

  <tbody>
    <tr>
      <td>Management Interface</td>

      <td>
        <p>Internet connectivity and IP address routed to provide the access to USM Anywhere.</p>
        <p>This IP address also allows connections to assets in a monitored network for log collection and asset scans. </p>
      </td>
    </tr>

    <tr>
      <td>
        <p>Network Monitoring Interface 1</p>
      </td>

      <td>Interface connected to a mirrored port in the network switch 1.</td>
    </tr>

    <tr>
      <td>Network Monitoring Interface 2</td>
      <td>Interface connected to a mirrored port in the network switch 2.</td>
    </tr>

    <tr>
      <td>Network Monitoring Interface 3</td>
      <td>Interface connected to a mirrored port in the network switch 3.</td>
    </tr>

    <tr>
      <td>Network Monitoring Interface 4</td>
      <td>Interface connected to a mirrored port in the network switch 4.</td>
    </tr>
  </tbody>
</table>

<Danger>
  **Warning:** The VMware Sensor and Hyper-V Sensor *require all five network interface cards (NICs)* to be enabled; otherwise, the USM Anywhere update will fail. The NICs can remain disconnected.

  You should only connect the other NICs to any additional network you want to monitor. Don't connect the NICs to the same Switched Port Analyzer (SPAN) port because it'll produce duplicate events in USM Anywhere.
</Danger>

Use the functions provided by the sensor console to configure the management interface and your Domain Name System (DNS).

<AccordionGroup>
  <Accordion title="Setting Up the Management Interface">
    By default, USM Anywhere has Dynamic Host Configuration Protocol (DHCP) and log collection enabled.

    **To configure the management interface automatically using DHCP**

    During the installation, your system sets an IP address assigned by a DHCP server. You can check the IP address afterwards:

    1. Connect to the USM Anywhere Sensor console.
    2. Go to **Network Configuration > View Network Configuration**.

    **To manually configure the management interface**

    1. Connect to the USM Anywhere Sensor console.
    2. Go to **Network Configuration > Configure Management Interface > Set a Static Management IP Address**.

    <Note>
      **Note:** The Configure Management Interface option is only available on VMware and Hyper-V Sensors.
    </Note>

    4. Enter the IP address.
    5. Press **Enter**.
  </Accordion>

  <Accordion title="Defining the DNS nameservers">
    The DNS nameserver is part of the DNS that maintains a directory of domain names and translates them to IP addresses.

    <Warning>
      **Important:** If you specify two servers for DNS resolution, USM Anywhere determines their priority by their order. Configure your local DNS in the first position to have DNS name resolution in your internal network.
    </Warning>

    **To define the DNS Nameservers**

    1. Connect to the USM Anywhere Sensor console.

    2. Go to **Network Configuration > Configure DNS**.

           <Note>
             **Note:** The Configure DNS option is only available on VMware and Hyper-V Sensors.
           </Note>

    3. Enter the primary DNS, and then press **Enter**.

       A confirmation screen opens to apply changes.

    4. Select **Yes**.

    5. (Optional) You can provide the secondary DNS, and then press **Enter**.

       When the confirmation screen appears to apply changes, select Yes.
  </Accordion>

  <Accordion title="Creating a Firewall Rule for Communication Between USM Anywhere Sensor and Cloud Service">
    USM Anywhere is hosted as a cloud service with an IP address that is not statically assigned and may change periodically. For this reason, you must set up a firewall rule that uses the URL of the cloud service to allow incoming and outgoing traffic between the USM Anywhere Sensor and the cloud service.

    <Frame>
      <img src="https://mintcdn.com/levelblue-5324744e/AfONLtCE7tRfJ2MJ/images/usm-anywhere/deployment-guide/setup/dns-control-node.webp?fit=max&auto=format&n=AfONLtCE7tRfJ2MJ&q=85&s=322ce1cdb78357ae980440b90b4ac838" width="440" height="142" data-path="images/usm-anywhere/deployment-guide/setup/dns-control-node.webp" />
    </Frame>

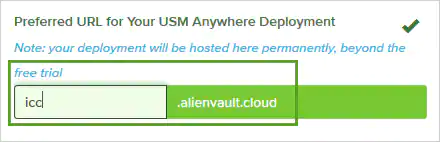
    In this example, the URL for the USM Anywhere instance is displayed within the green box.
  </Accordion>

  <Accordion title="Checking Your Settings">
    You can verify your network settings in the USM Anywhere Sensor Setup wizard or through the sensor console.

    **To verify the network settings in the USM Anywhere web user interface (UI)**

    1. Go to **Data Sources > Sensors**, and then click the USM Anywhere Sensor name.

       At the bottom of the USM Anywhere Sensor page, click the **Network IDS** tab. Here you can view the traffic in your network over various interfaces.

           <Warning>
             **Important:** The interface will only show as receiving data if it is receiving more than 1000 packets over a 30-second period.
           </Warning>

       You can configure a new interface as well as port mirroring here. See the following documentation for more information:

       * [Direct Traffic from Your Physical Network to the VMware Sensor](../vmware/getting-traffic-from-physical-network-vmware)
       * [Direct Traffic from Your Physical Network to the Hyper-V Sensor](../hyperv/getting-traffic-from-physical-network-hyper-v)

    The **Network IDS** tab also allows you to configure your Classless Inter-Domain Routing (<Tooltip tip="Classless Inter-Domain Routing, which provides a method for allocating IP addresses, routing Internet protocol packets, and subdividing networks. CIDR notation provides a syntax for specifying a range of IP addresses.">CIDR</Tooltip>) blocks by clicking the **Configure CIDR Blocks** button. Your CIDR blocks are automatically populated by the setup wizard during the initial USM Anywhere Sensor deployment. By default, the system will scan all internal IPv4 addresses and assign their names based on those designated in your <Tooltip tip="Asset groups are administratively created objects that group similar assets for specific purposes.">asset groups</Tooltip>.

    If you want to remove a block or change the subnet range of the block, click the **x** button next to the CIDR block to remove it, and then click **Add Another CIDR Block** to input a new CIDR block with the desired subnet range. Be aware, however, that removing part of a subnet range or deleting a block completely will result in the sensor no longer monitoring that portion of your internal network.

    **To verify the network settings in the USM Anywhere Sensor console**

    1. Connect to the USM Anywhere Sensor console.
    2. Go to **Network Configuration > View Network Configuration**.
  </Accordion>
</AccordionGroup>
