> ## Documentation Index
> Fetch the complete documentation index at: https://docs.levelblue.com/llms.txt
> Use this file to discover all available pages before exploring further.
# Configuring Columns within List View
Role Availability | ✔️ Read-Only ✔️ Investigator ✔️ Analyst ✔️ Manager
Within the page, you can configure the columns and fields that display in the list view. You can also save your configuration settings for later use.
**To configure your columns**
1. From the alarms list view, click the  icon.
The Manage Columns dialog box opens.
icon.
The Manage Columns dialog box opens.
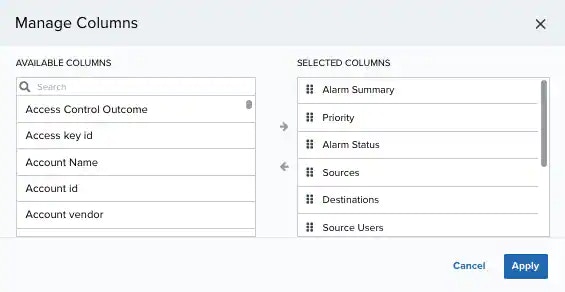 2. Search the columns you want to have in the list view by using the search field.
3. Use the
2. Search the columns you want to have in the list view by using the search field.
3. Use the  and
and  icons to select or deselect from the available columns.
4. You can order the columns by clicking and dragging the column to the desired place.
5. Click **Apply**.
If you generate a report when you have set custom columns, your report keeps the columns you have configured.
If you want to keep your configuration, you need to save it by selecting **Save View > Save As**. Otherwise, your custom view is not kept when you move to another feature. See [Alarms Views](/documentation/usm-anywhere/user-guide/alarms/views) for more information.
icons to select or deselect from the available columns.
4. You can order the columns by clicking and dragging the column to the desired place.
5. Click **Apply**.
If you generate a report when you have set custom columns, your report keeps the columns you have configured.
If you want to keep your configuration, you need to save it by selecting **Save View > Save As**. Otherwise, your custom view is not kept when you move to another feature. See [Alarms Views](/documentation/usm-anywhere/user-guide/alarms/views) for more information.