> ## Documentation Index
> Fetch the complete documentation index at: https://docs.levelblue.com/llms.txt
> Use this file to discover all available pages before exploring further.
# Scheduling Authenticated Asset Group Scans from Asset Groups
| | | | | |
| --------------------- | ------------- | ---------------- | ----------- | ----------- |
| **Role Availability** | **Read-Only** | **Investigator** | **Analyst** | **Manager** |
USM Anywhere provides a simple way to include authenticated scans for scheduling using its web user interface (UI). See [USM Anywhere Scheduler](../scheduler/scheduler) for more information.
**To schedule an authenticated asset group scan job from the asset group details window**
1. Go to **Environment > Asset Groups**.
2. Click the  icon you want to include in an asset scan and select Full Details.
3. Select **Actions > Schedule Scan Job**.
The Schedule New Job dialog box opens.
icon you want to include in an asset scan and select Full Details.
3. Select **Actions > Schedule Scan Job**.
The Schedule New Job dialog box opens.
 4. Enter the name and description for the job.
The description is optional, but it is a best practice to provide this information so that others can easily understand what it does.
5. In the Action Type field, select **Authenticated Asset Scanner**.
6. Select a sensor in case you have more than one installed.
7. In the App Action field, Asset Group Scan is the default option.
8. In the Asset Group field, you can either enter the asset group name or browse asset groups.
9. In the Schedule section, specify when USM Anywhere runs the job:
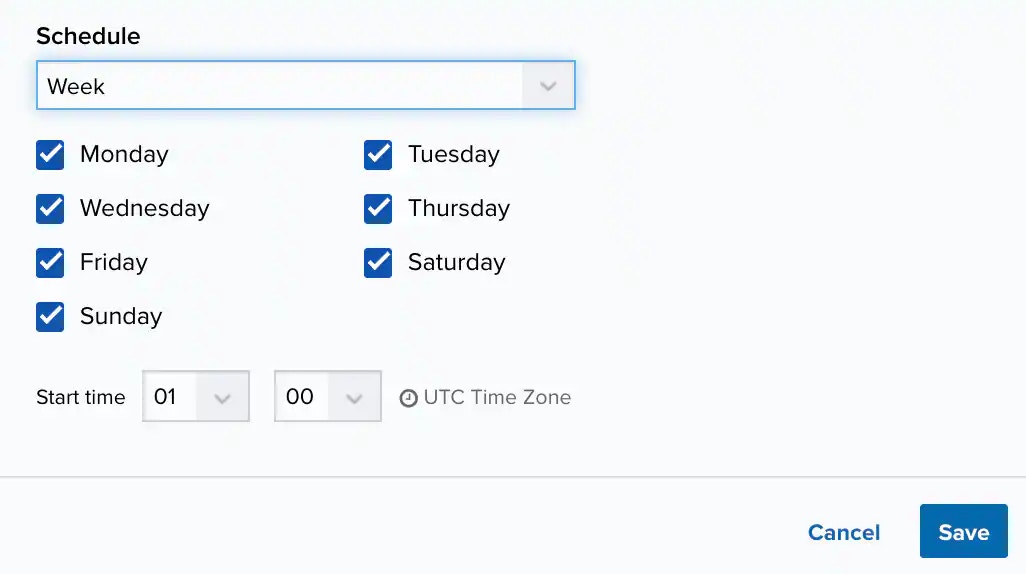
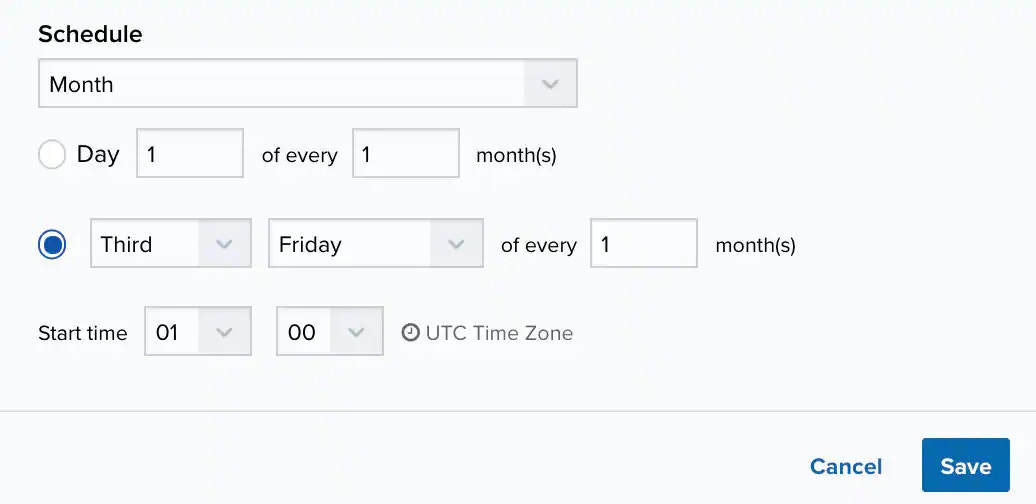
a. Select the increment as **Minute**, **Hour**, **Day**, **Week**, **Month**, or **Year**.
**Warning:** After a frequency change, monitor the system to check its performance. For example, you can check the system load and CPU. See [USM Anywhere System Monitor](../system-status/system-monitor) for more information.
b. Set the interval options for the increment.
The selected increment determines the available options. For example, on a weekly increment, you can select the days of the week to run the job.
4. Enter the name and description for the job.
The description is optional, but it is a best practice to provide this information so that others can easily understand what it does.
5. In the Action Type field, select **Authenticated Asset Scanner**.
6. Select a sensor in case you have more than one installed.
7. In the App Action field, Asset Group Scan is the default option.
8. In the Asset Group field, you can either enter the asset group name or browse asset groups.
9. In the Schedule section, specify when USM Anywhere runs the job:
a. Select the increment as **Minute**, **Hour**, **Day**, **Week**, **Month**, or **Year**.
**Warning:** After a frequency change, monitor the system to check its performance. For example, you can check the system load and CPU. See [USM Anywhere System Monitor](../system-status/system-monitor) for more information.
b. Set the interval options for the increment.
The selected increment determines the available options. For example, on a weekly increment, you can select the days of the week to run the job.
 Important: USM Anywhere restarts the schedule on the first day of the month if the option "Every x days" is selected.
c.Set the start time.
This is the time that the job starts at the specified interval. It uses the time zone configured for your USM Anywhere instance (the default is Coordinated Universal Time \[UTC]).
10. Click **Save**.
The job now displays in the job scheduler list.
**Note:** See [USM Anywhere Scheduler](../scheduler/scheduler) for more information.
Important: USM Anywhere restarts the schedule on the first day of the month if the option "Every x days" is selected.
c.Set the start time.
This is the time that the job starts at the specified interval. It uses the time zone configured for your USM Anywhere instance (the default is Coordinated Universal Time \[UTC]).
10. Click **Save**.
The job now displays in the job scheduler list.
**Note:** See [USM Anywhere Scheduler](../scheduler/scheduler) for more information.