> ## Documentation Index
> Fetch the complete documentation index at: https://docs.levelblue.com/llms.txt
> Use this file to discover all available pages before exploring further.
# Adding an AWS Cloud Connector
| | | | | |
| --------------------- | --------- | ------------ | ----------- | ----------- |
| **Role Availability** | Read-Only | Investigator | **Analyst** | **Manager** |
It is necessary to add an Amazon Web Services (AWS) Cloud Connector into USM Anywhere to enable it to receive the data stored in your Amazon Simple Storage Service (S3) buckets, generate the related events in USM Anywhere with that data, and provide real-time alerting to identify malicious activity.
**To add an AWS Cloud Connector**
1. Go to **Data Sources > Cloud Connectors**.
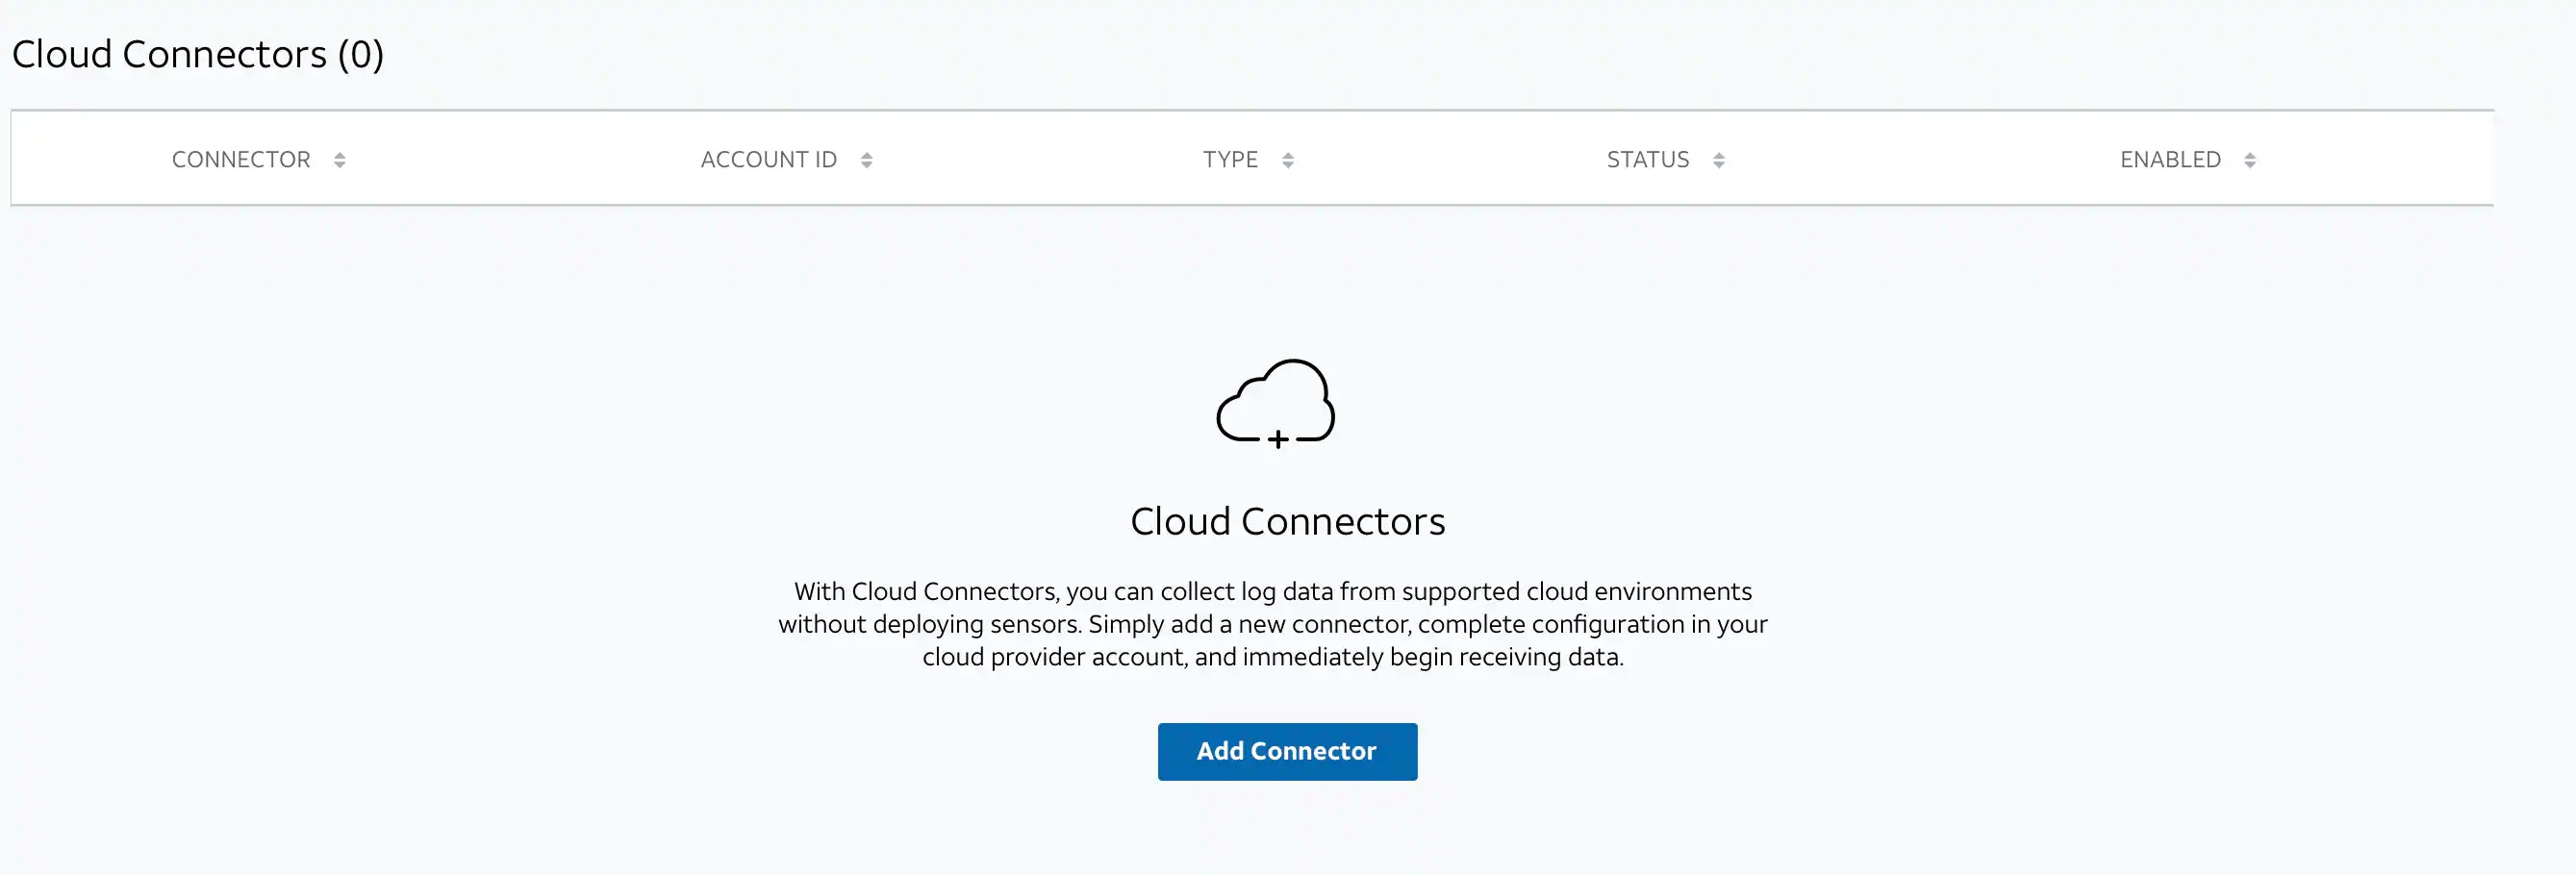 2. Click **Add Connector**.
The Add New Connector dialog box opens.
2. Click **Add Connector**.
The Add New Connector dialog box opens.
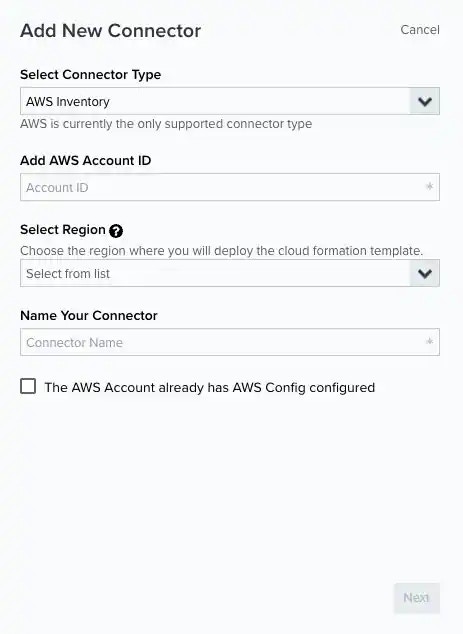 3. Select **AWS S3** or **AWS Inventory**.
4. Enter your AWS account identifier (ID).
5. Select the region where you want to deploy the AWS CloudFormation template.
6. (Optional.) Enter a name for your AWS Cloud Connector.
7. For Inventory connector types, select the checkbox if this AWS account already has the AWS Config service configured.
8. Click **Next**.
3. Select **AWS S3** or **AWS Inventory**.
4. Enter your AWS account identifier (ID).
5. Select the region where you want to deploy the AWS CloudFormation template.
6. (Optional.) Enter a name for your AWS Cloud Connector.
7. For Inventory connector types, select the checkbox if this AWS account already has the AWS Config service configured.
8. Click **Next**.
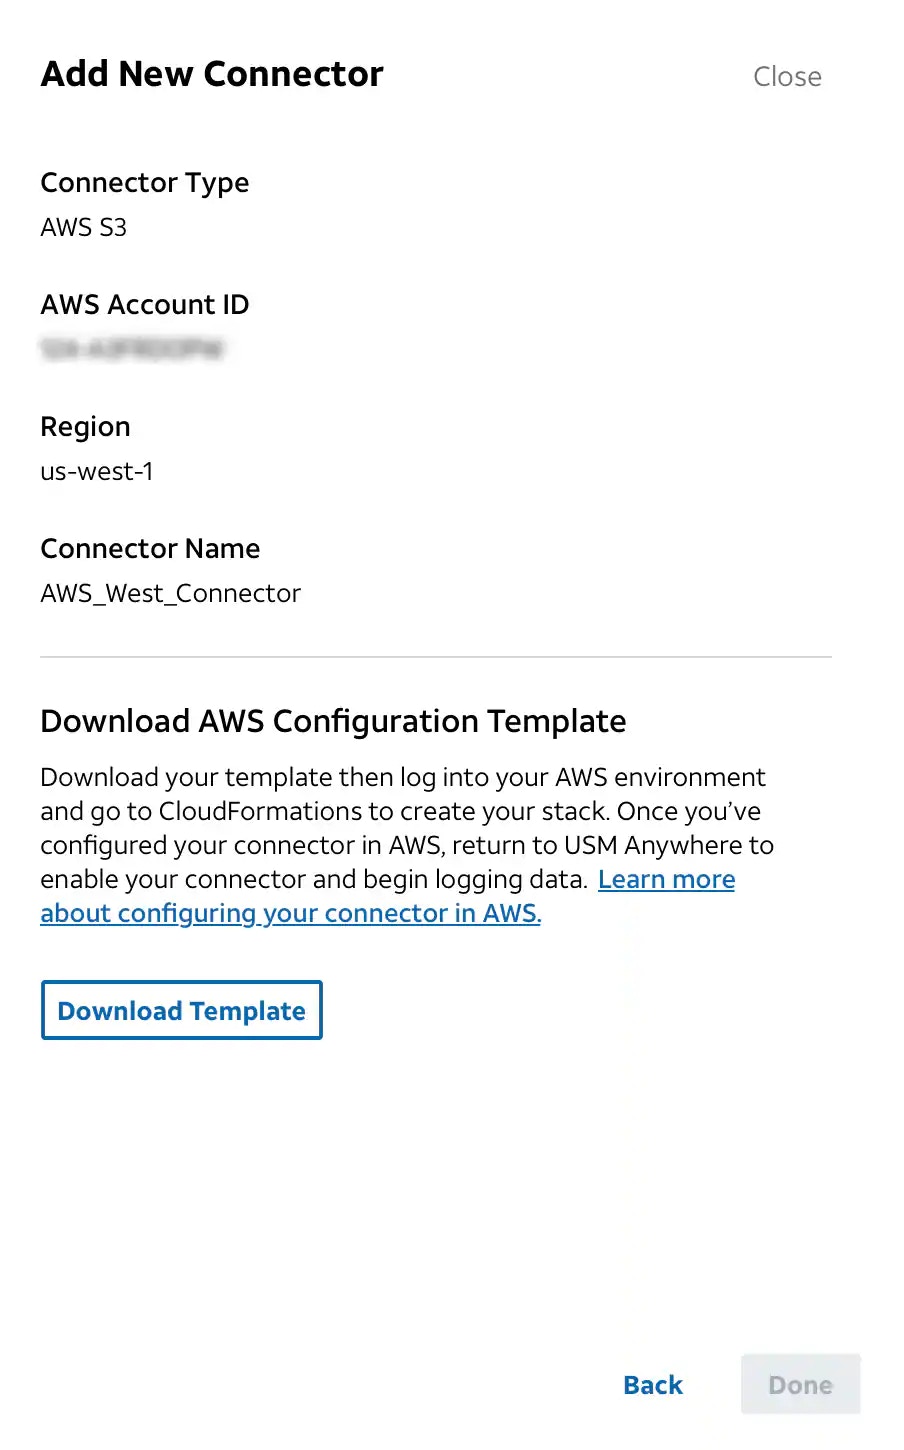 9. (Optional.) Click **Download Template**.
See [Downloading an Existing AWS Cloud Connector Template](/documentation/usm-anywhere/user-guide/cloud-connector/aws/downloading-template) for more information.
10. Click **Done**.
**Note:** USM Anywhere generates a console user event when an AWS Cloud Connector is created, modified, enabled, disabled, or deleted. See [USM Anywhere Console User Events List View](/documentation/usm-anywhere/user-guide/console-user-events/console-user-events-list-view) for more information.
9. (Optional.) Click **Download Template**.
See [Downloading an Existing AWS Cloud Connector Template](/documentation/usm-anywhere/user-guide/cloud-connector/aws/downloading-template) for more information.
10. Click **Done**.
**Note:** USM Anywhere generates a console user event when an AWS Cloud Connector is created, modified, enabled, disabled, or deleted. See [USM Anywhere Console User Events List View](/documentation/usm-anywhere/user-guide/console-user-events/console-user-events-list-view) for more information.