> ## Documentation Index
> Fetch the complete documentation index at: https://docs.levelblue.com/llms.txt
> Use this file to discover all available pages before exploring further.
# Working with Assets and PCI DSS
| | | | | |
| --------------------- | --------- | ------------ | ----------- | ----------- |
| **Role Availability** | Read-Only | Investigator | **Analyst** | **Manager** |
The Payment Card Industry Data Security Standards (PCI DSS) views in USM Anywhere have pre-defined filters based on the PCI DSS Asset Group. This section provides instructions on assigning assets and asset group to populate the views with data.
**Note:** USM Anywhere generates PCI reports from the assets assigned to the PCI DSS Asset Group. See [USM Anywhere Compliance Templates](https://cybersecurity.att.com/documentation/usm-anywhere/user-guide/reports/compliance-templates) for more information.
**To assign Assets to the PCI DSS Asset Group**
1. Go to **Environment > Assets**.
2. Select the assets you want to include into the PCI DSS Asset Group. See [Selecting Assets in Asset List View](https://cybersecurity.att.com/documentation/usm-anywhere/user-guide/asset-management/asset-administration/selecting-assets) for assistance.
3. Select **Actions > Set Compliance Scope**.
4. Select **PCI**.
 5. Click **Save** and the selected assets will join the PCI DSS Asset Group.
**To identify PCI Assets**
1. Go to **Environment > Assets**.
2. In the upper-left side of the page, click the **Configure Filters** link.
3. Search for **PCI Asset** in the available filters.
5. Click **Save** and the selected assets will join the PCI DSS Asset Group.
**To identify PCI Assets**
1. Go to **Environment > Assets**.
2. In the upper-left side of the page, click the **Configure Filters** link.
3. Search for **PCI Asset** in the available filters.
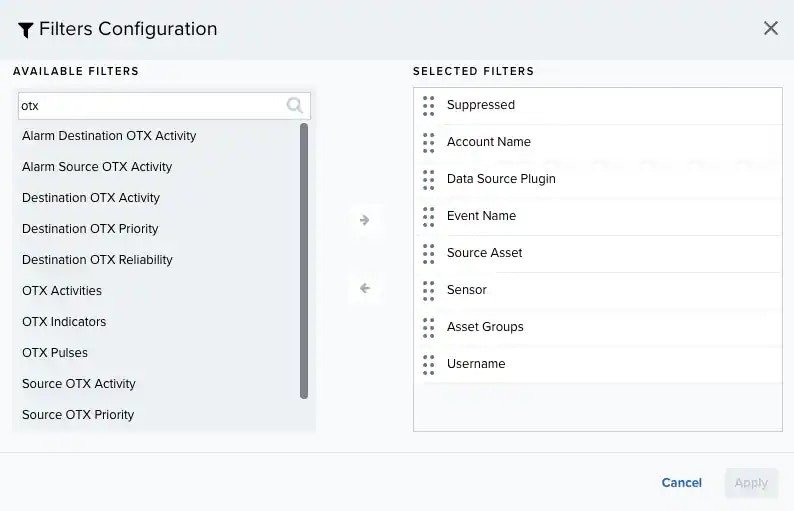 4. Click the
  icon to select the filter.
5. Click **Apply**.
6. In the left panel, scroll to the bottom to find the section for the PCI Asset filter.
7. Click **Yes (n)**. The number in parentheses indicates the number of PCI Assets.
icon to select the filter.
5. Click **Apply**.
6. In the left panel, scroll to the bottom to find the section for the PCI Asset filter.
7. Click **Yes (n)**. The number in parentheses indicates the number of PCI Assets.