> ## Documentation Index
> Fetch the complete documentation index at: https://docs.levelblue.com/llms.txt
> Use this file to discover all available pages before exploring further.
# USM Anywhere Custom Dashboards
| | | | | |
| --------------------- | ------------- | ---------------- | ----------- | ----------- |
| **Role Availability** | **Read-Only** | **Investigator** | **Analyst** | **Manager** |
USM Anywhere enables you to create and customize your own dashboards with the widgets and content you need.
This feature is available in the Standard and Premium editions of USM Anywhere.
See the [Affordable pricing to fit every budget](https://levelblue.com/pricing) page for more information about the features and support provided by each of the USM Anywhere editions.
### To create a custom dashboard
1. Go to any dashboard.
2. Click **Create Custom Dashboard.**
 3. Enter a title for your dashboard.
4. Use the Share Dashboard box for sharing your custom dashboard. This option is disabled by default. See [Sharing your Custom Dashboard](documentation/usm-anywhere/user-guide/dashboards/creating-custom-dashboard) for more information.
5. Add the number of rows you need and select the number of columns you want for each row, between 1 and 4. You can select the row height (small, medium, or large) for each column.
6. Click **Save.**
Your custom dashboard is created and displayed. The page appears empty because you have not selected any widget yet.
### To configure your custom dashboard
1. Go to **Dashboards > Custom Dashboards** and open your dashboard.
3. Enter a title for your dashboard.
4. Use the Share Dashboard box for sharing your custom dashboard. This option is disabled by default. See [Sharing your Custom Dashboard](documentation/usm-anywhere/user-guide/dashboards/creating-custom-dashboard) for more information.
5. Add the number of rows you need and select the number of columns you want for each row, between 1 and 4. You can select the row height (small, medium, or large) for each column.
6. Click **Save.**
Your custom dashboard is created and displayed. The page appears empty because you have not selected any widget yet.
### To configure your custom dashboard
1. Go to **Dashboards > Custom Dashboards** and open your dashboard.
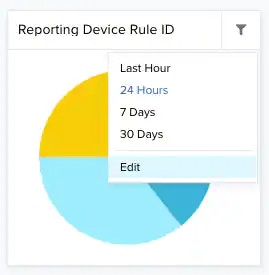
 2. On the widget that you want to configure, click the
  icon.
icon.
 3. Choose a widget type between **Alarms, Events, Assets, Vulnerabilities**, and **Configuration Issues.** Every widget has his own widget data.
4. You can change the title of the widget.
5. (Optional.) You can select a saved view filter if you have custom views for the selected type of widget.
6. Click **Save.**
You can move the widgets inside your dashboard. Click the widget that you want to move and drag it to the space you want to move it to. If it is an empty space, the widget will display in it. If it is in a space occupied by another widget, the widgets will replace each other.
### To edit your custom dashboard
1. Go to **Dashboards > Custom Dashboards** and open your dashboard.
2. Select **Actions > Edit Dashboard.**
3. Choose a widget type between **Alarms, Events, Assets, Vulnerabilities**, and **Configuration Issues.** Every widget has his own widget data.
4. You can change the title of the widget.
5. (Optional.) You can select a saved view filter if you have custom views for the selected type of widget.
6. Click **Save.**
You can move the widgets inside your dashboard. Click the widget that you want to move and drag it to the space you want to move it to. If it is an empty space, the widget will display in it. If it is in a space occupied by another widget, the widgets will replace each other.
### To edit your custom dashboard
1. Go to **Dashboards > Custom Dashboards** and open your dashboard.
2. Select **Actions > Edit Dashboard.**
 3. Modify the information you need to.
4. Click **Save**
### To edit a widget in your custom dashboard
1. Go to **Dashboards > Custom Dashboards** and open your dashboard.
2. Click the
3. Modify the information you need to.
4. Click **Save**
### To edit a widget in your custom dashboard
1. Go to **Dashboards > Custom Dashboards** and open your dashboard.
2. Click the  icon and select Edit.
 The Edit Widget dialog box opens.
3. Modify the information of the items that need to be modified.
4. Click **Save**
### To modify the title of a widget in your custom dashboard
1. Go to **Dashboards > Custom Dashboards** and open your dashboard.
2. Click the icon and select Edit.
The Edit Widget dialog box opens.
3. Modify the title.
The Edit Widget dialog box opens.
3. Modify the information of the items that need to be modified.
4. Click **Save**
### To modify the title of a widget in your custom dashboard
1. Go to **Dashboards > Custom Dashboards** and open your dashboard.
2. Click the icon and select Edit.
The Edit Widget dialog box opens.
3. Modify the title.
 4. Click **Save.**
### To clone your custom dashboard
1. Go to **Dashboards > Custom Dashboards** and open your dashboard.
2. Select **Actions > Clone Dashboard.**
4. Click **Save.**
### To clone your custom dashboard
1. Go to **Dashboards > Custom Dashboards** and open your dashboard.
2. Select **Actions > Clone Dashboard.**
 3. Enter a title for the new dashboard.
4. Click **Save.**
The new dashboard displays.
If you clone a shared custom dashboard, the cloned dashboard will have the shared option disabled by default. See [Sharing your Custom Dashboard](documentation/usm-anywhere/user-guide/dashboards/creating-custom-dashboard) for more information.
### To delete your custom dashboard
1. Go to **Dashboards > Custom Dashboards** and open your dashboard.
2. Select **Actions > Delete Dashboard** to open the delete dashboard dialog box.
3. Enter a title for the new dashboard.
4. Click **Save.**
The new dashboard displays.
If you clone a shared custom dashboard, the cloned dashboard will have the shared option disabled by default. See [Sharing your Custom Dashboard](documentation/usm-anywhere/user-guide/dashboards/creating-custom-dashboard) for more information.
### To delete your custom dashboard
1. Go to **Dashboards > Custom Dashboards** and open your dashboard.
2. Select **Actions > Delete Dashboard** to open the delete dashboard dialog box.
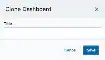
 3. Click **Confirm.**
## Sharing your Custom Dashboard
USM Anywhere enables you to share the custom dashboards you have created. This option is disabled by default.
Keep in mind you can not edit or delete a shared dashboard. Shared custom dashboards are read-only dashboards. If you want to edit a shared custom dashboard, you have to clone it beforehand. See [To clone your custom dashboard](documentation/usm-anywhere/user-guide/dashboards/creating-custom-dashboard.htm) for more information.
### To share a new custom dashboard
1. Go to any dashboard.
2. Click **Create Custom Dashboard.**
3. Enter a title for your dashboard.
4. Select the Share Dashboard box for sharing your custom dashboard. This option is disabled by default.
3. Click **Confirm.**
## Sharing your Custom Dashboard
USM Anywhere enables you to share the custom dashboards you have created. This option is disabled by default.
Keep in mind you can not edit or delete a shared dashboard. Shared custom dashboards are read-only dashboards. If you want to edit a shared custom dashboard, you have to clone it beforehand. See [To clone your custom dashboard](documentation/usm-anywhere/user-guide/dashboards/creating-custom-dashboard.htm) for more information.
### To share a new custom dashboard
1. Go to any dashboard.
2. Click **Create Custom Dashboard.**
3. Enter a title for your dashboard.
4. Select the Share Dashboard box for sharing your custom dashboard. This option is disabled by default.
 5. Add the number of rows you need and select the number of columns you want for each row, between 1 and 4. You can select the row height (small, medium, or large) for each column.
6. Click **Save**
### To share an existing custom dashboard
1. Go to **Dashboards > Custom Dashboards** and open the custom dashboard you want to share.
2. Select **Actions > Edit Dashboard.**
3. Select the Share Dashboard box for sharing your custom dashboard.
4. Click **Save.**
### To stop sharing a custom dashboard
1. Go to **Dashboards > Custom Dashboards** and open the custom dashboard you want to stop sharing.
2. Select **Actions > Edit Dashboard.**
3. Deselect the Share Dashboard box to remove the option.
4. Click **Save.**
5. Add the number of rows you need and select the number of columns you want for each row, between 1 and 4. You can select the row height (small, medium, or large) for each column.
6. Click **Save**
### To share an existing custom dashboard
1. Go to **Dashboards > Custom Dashboards** and open the custom dashboard you want to share.
2. Select **Actions > Edit Dashboard.**
3. Select the Share Dashboard box for sharing your custom dashboard.
4. Click **Save.**
### To stop sharing a custom dashboard
1. Go to **Dashboards > Custom Dashboards** and open the custom dashboard you want to stop sharing.
2. Select **Actions > Edit Dashboard.**
3. Deselect the Share Dashboard box to remove the option.
4. Click **Save.**