> ## Documentation Index
> Fetch the complete documentation index at: https://docs.levelblue.com/llms.txt
> Use this file to discover all available pages before exploring further.
# HIPAA §164.308(a)(1)(ii)(A) Conduct Risk Assessment
| | | | | |
| --------------------- | --------- | ---------------- | ----------- | ----------- |
| **Role Availability** | Read-Only | **Investigator** | **Analyst** | **Manager** |
The **HIPAA A03 §164.308(a)(1)(ii)(A) - Conduct Risk Assessment** report generated from this template provides a risk assessment and analysis of the potential threats and vulnerabilities to the confidentiality, integrity, and availability of ePHI in your system.
**To generate the HIPAA A03 §164.308(a)(1)(ii)(A) Conduct Risk Assessment report**
1. Go to **Reports > Compliance Templates**.
2. On the left navigation pane, click **HIPAA**.
3. Click **Generate Report** on the specific line for this report. The **Configure Report** dialog box appears.
This report does not have selected filters because it goes directly to an asset inventory.
4. Click the date field if you want to choose a different date range. Choose **Last Hour**, **Last 24 Hours**, **Last 7 Days**, **Last 30 Days**, **Last 90 Days**, or **Custom Range** to set a particular date range.
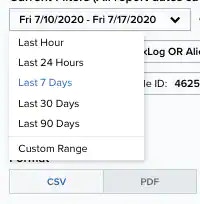 5. Select the **Format** of the report. It can either be **CSV** or **PDF**.
6. Select a **Schedule** for the report if you want to generate it again: **Daily**, **Weekly**, **Bi-weekly**, and **Monthly**. Otherwise, select **Never**.
7. Enter an email address in which to send the report. You may also select the **Send to my Email Address** option to add your email address automatically.
8. Select the **Enable link expiration** option.
This link is delivered by email and expires in 14 days.
9. Click **Next**.
10. In the **Report Name** field, enter a name for the report. This name will be displayed on the **Saved Reports** page.
11. **(OPTIONAL)** Enter a **Report Description**.
12. Under the **Number of Records** section, select the maximum number of records to include in the report: **20**, **50**, **100**, **500**, **1000**, or **2500**.
13. If you have previously chosen the **PDF** format, you will see the **Graphs** section, which you can use to include additional views. You can add to or remove graphs from the report by clicking the
5. Select the **Format** of the report. It can either be **CSV** or **PDF**.
6. Select a **Schedule** for the report if you want to generate it again: **Daily**, **Weekly**, **Bi-weekly**, and **Monthly**. Otherwise, select **Never**.
7. Enter an email address in which to send the report. You may also select the **Send to my Email Address** option to add your email address automatically.
8. Select the **Enable link expiration** option.
This link is delivered by email and expires in 14 days.
9. Click **Next**.
10. In the **Report Name** field, enter a name for the report. This name will be displayed on the **Saved Reports** page.
11. **(OPTIONAL)** Enter a **Report Description**.
12. Under the **Number of Records** section, select the maximum number of records to include in the report: **20**, **50**, **100**, **500**, **1000**, or **2500**.
13. If you have previously chosen the **PDF** format, you will see the **Graphs** section, which you can use to include additional views. You can add to or remove graphs from the report by clicking the  and
and  icons.
14. Click **Run** to run the report.
Click **Save & Run** if you wish to keep the report in your [Saved Reports on USM Anywhere](/documentation/usm-anywhere/user-guide/reports/saved-reports) page and receive the report in the indicated email.
icons.
14. Click **Run** to run the report.
Click **Save & Run** if you wish to keep the report in your [Saved Reports on USM Anywhere](/documentation/usm-anywhere/user-guide/reports/saved-reports) page and receive the report in the indicated email.