> ## Documentation Index
> Fetch the complete documentation index at: https://docs.levelblue.com/llms.txt
> Use this file to discover all available pages before exploring further.
# HIPAA Control §164.312 (a)(1) Access Control
| | | | | |
| --------------------- | --------- | ---------------- | ----------- | ----------- |
| **Role Availability** | Read-Only | **Investigator** | **Analyst** | **Manager** |
The **HIPAA Control §164.312 (a)(1) - Access Control** report that can be generated from this template allows you to implement technical policies and procedures for electronic information systems that maintain ePHI, allowing access only to users that have been granted rights. In this report, a “user” can refer to any entity that accesses your practice’s ePHI, whether it is a person or a device.
In general, this report may be used for the following activities:
* Analysis of workload and operations to identify the access needs of all users
* Identification of technical access control capabilities
* Verification of unique identifiers that are assigned to all system users
* Development of access control policy
* Implementation of access control procedures using selected hardware and software
* Review and update of user access
* Establishment of an emergency access procedure
* Automatic logoff, encryption, and decryption processes
* Termination of access if it is no longer required
**Filters used by HIPAA Control §164.312 (a)(1) Access Control**
| Filter | Value |
| ------------ | ------- |
| Asset Groups | "HIPAA" |
| Suppressed | False |
**To generate the HIPAA Control §164.312 (a)(1) Access Control report**
1. Go to **Reports > Compliance Templates**.
2. On the left navigation pane, click **HIPAA**.
3. Click **Generate Report** on the specific line for this report. The **Configure Report** dialog box appears.
4. Click **Edit Filters** if you want to modify the selected filters, and then click **Continue to Filters**.
5. Make the required modifications, and then click **Edit Report**.
6. Click the date field if you want to choose a different date range. Select **Last Hour**, **Last 24 Hours**, **Last 7 Days**, **Last 30 Days**, **Last 90 Days**, or **Custom Range** to set a particular date range.
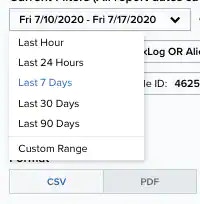 7. Select the **Format** of the report. It can either be **CSV** or **PDF**.
8. Select a **Schedule** for the report if you want to generate it again: **Daily**, **Weekly**, **Bi-weekly**, and **Monthly**. Otherwise, select **Never**.
9. Enter an email address in which to send the report. You may also select the **Send to my Email Address** option to add your email address automatically.
10. Select the **Enable link expiration** option.
This link is delivered by email and expires in 14 days.
11. Click **Next**.
12. In the **Report Name** field, enter a name for the report. This name will be displayed on the **Saved Reports** page.
13. **(OPTIONAL)** Enter a **Report Description**.
14. Under the **Number of Records** section, select the maximum number of records to include in the report: **20**, **50**, **100**, **500**, **1000**, or **2500**.
15. If you have previously chosen the **PDF** format, you will see the **Graphs** section, which you can use to include additional views. You can add to or remove graphs from the report by clicking the
7. Select the **Format** of the report. It can either be **CSV** or **PDF**.
8. Select a **Schedule** for the report if you want to generate it again: **Daily**, **Weekly**, **Bi-weekly**, and **Monthly**. Otherwise, select **Never**.
9. Enter an email address in which to send the report. You may also select the **Send to my Email Address** option to add your email address automatically.
10. Select the **Enable link expiration** option.
This link is delivered by email and expires in 14 days.
11. Click **Next**.
12. In the **Report Name** field, enter a name for the report. This name will be displayed on the **Saved Reports** page.
13. **(OPTIONAL)** Enter a **Report Description**.
14. Under the **Number of Records** section, select the maximum number of records to include in the report: **20**, **50**, **100**, **500**, **1000**, or **2500**.
15. If you have previously chosen the **PDF** format, you will see the **Graphs** section, which you can use to include additional views. You can add to or remove graphs from the report by clicking the  and
and  icons.
16. Click **Run** to run the report.
Click **Save & Run** if you wish to keep the report in your [Saved Reports on USM Anywhere](/documentation/usm-anywhere/user-guide/reports/saved-reports) page and receive the report in the indicated email.
icons.
16. Click **Run** to run the report.
Click **Save & Run** if you wish to keep the report in your [Saved Reports on USM Anywhere](/documentation/usm-anywhere/user-guide/reports/saved-reports) page and receive the report in the indicated email.