> ## Documentation Index
> Fetch the complete documentation index at: https://docs.levelblue.com/llms.txt
> Use this file to discover all available pages before exploring further.
# API Clients
| | | | | |
| --------------------- | --------- | ------------ | ------- | ----------- |
| **Role Availability** | Read-Only | Investigator | Analyst | **Manager** |
USM Anywhere offers a REST API framework that enables you to customize elements of data in your environment. The APIs return JSON responses and any errors in those returns use HTTP response codes. To access the API, you will need to create a client ID and secret code in the USM Anywhere interface, and use that information to create a token. USM Anywhere uses OAuth 2.0 to authenticate against the REST APIs.
**Edition:** The API is available in the Standard and Premium editions of USM Anywhere.
See the [Affordable pricing to fit every budget](https://www.levelblue.com/pricing) page for more information about the features and support provided by each of the USM Anywhere editions.
**To open the API Clients page**
1. In the USM Anywhere web UI secondary menu, click the  icon and select **Profile Settings**.
2. Select **API Clients** tab.
icon and select **Profile Settings**.
2. Select **API Clients** tab.
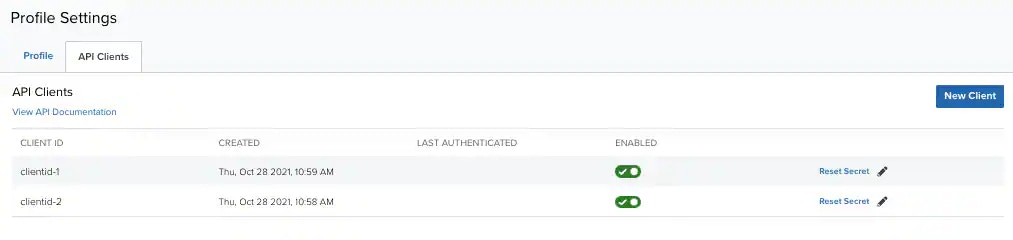 3. Click **New Client** to create a new client. See the [LevelBlue APIs]() for more information.
**To enable an API Client**
1. In the USM Anywhere web UI secondary menu, click the icon and select Profile Settings.
2. Select **API Clients**.
3. Locate the API client that you want to enable and click the
3. Click **New Client** to create a new client. See the [LevelBlue APIs]() for more information.
**To enable an API Client**
1. In the USM Anywhere web UI secondary menu, click the icon and select Profile Settings.
2. Select **API Clients**.
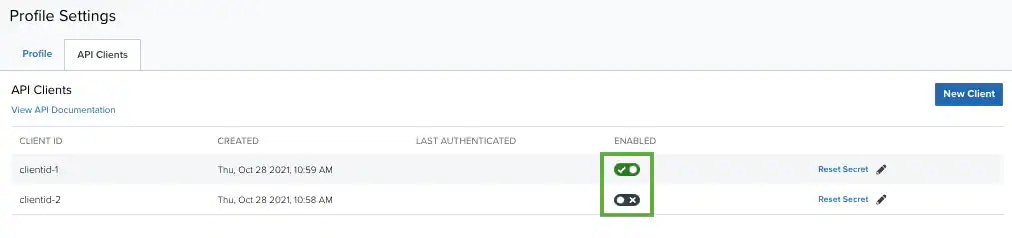
3. Locate the API client that you want to enable and click the  icon. This turns the
  icon green. To disable an already enabled API Client, toggle the icon to its original status.
 **To edit an API Client**
1. In the USM Anywhere web UI secondary menu, click the icon and select Profile Settings.
2. Select API Clients.
3. Locate the API client that you want to modify and click the
**To edit an API Client**
1. In the USM Anywhere web UI secondary menu, click the icon and select Profile Settings.
2. Select API Clients.
3. Locate the API client that you want to modify and click the  icon to open a new window.
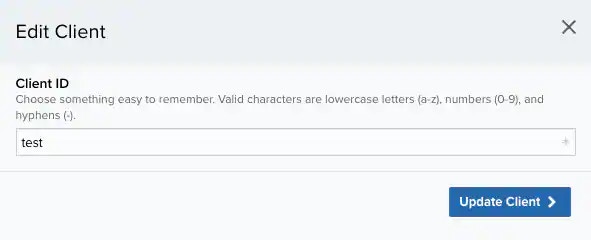 4. Make changes to the client ID, as needed.
5. Click **Update Client**.
4. Make changes to the client ID, as needed.
5. Click **Update Client**.