> ## Documentation Index
> Fetch the complete documentation index at: https://docs.levelblue.com/llms.txt
> Use this file to discover all available pages before exploring further.
# Configuring Single Sign-On
| | | | | |
| --------------------- | --------- | ------------ | ------- | ----------- |
| **Role Availability** | Read-Only | Investigator | Analyst | **Manager** |
To use a Single Sign-On (SSO) vendor to log in to a USM Anywhere instance, you need to create a new SSO configuration.
Only users with the manager role will be able to create, edit, and delete SSO configurations.
**To configure SSO in USM Anywhere**
1. Go to **Settings** > **Single Sign On**.
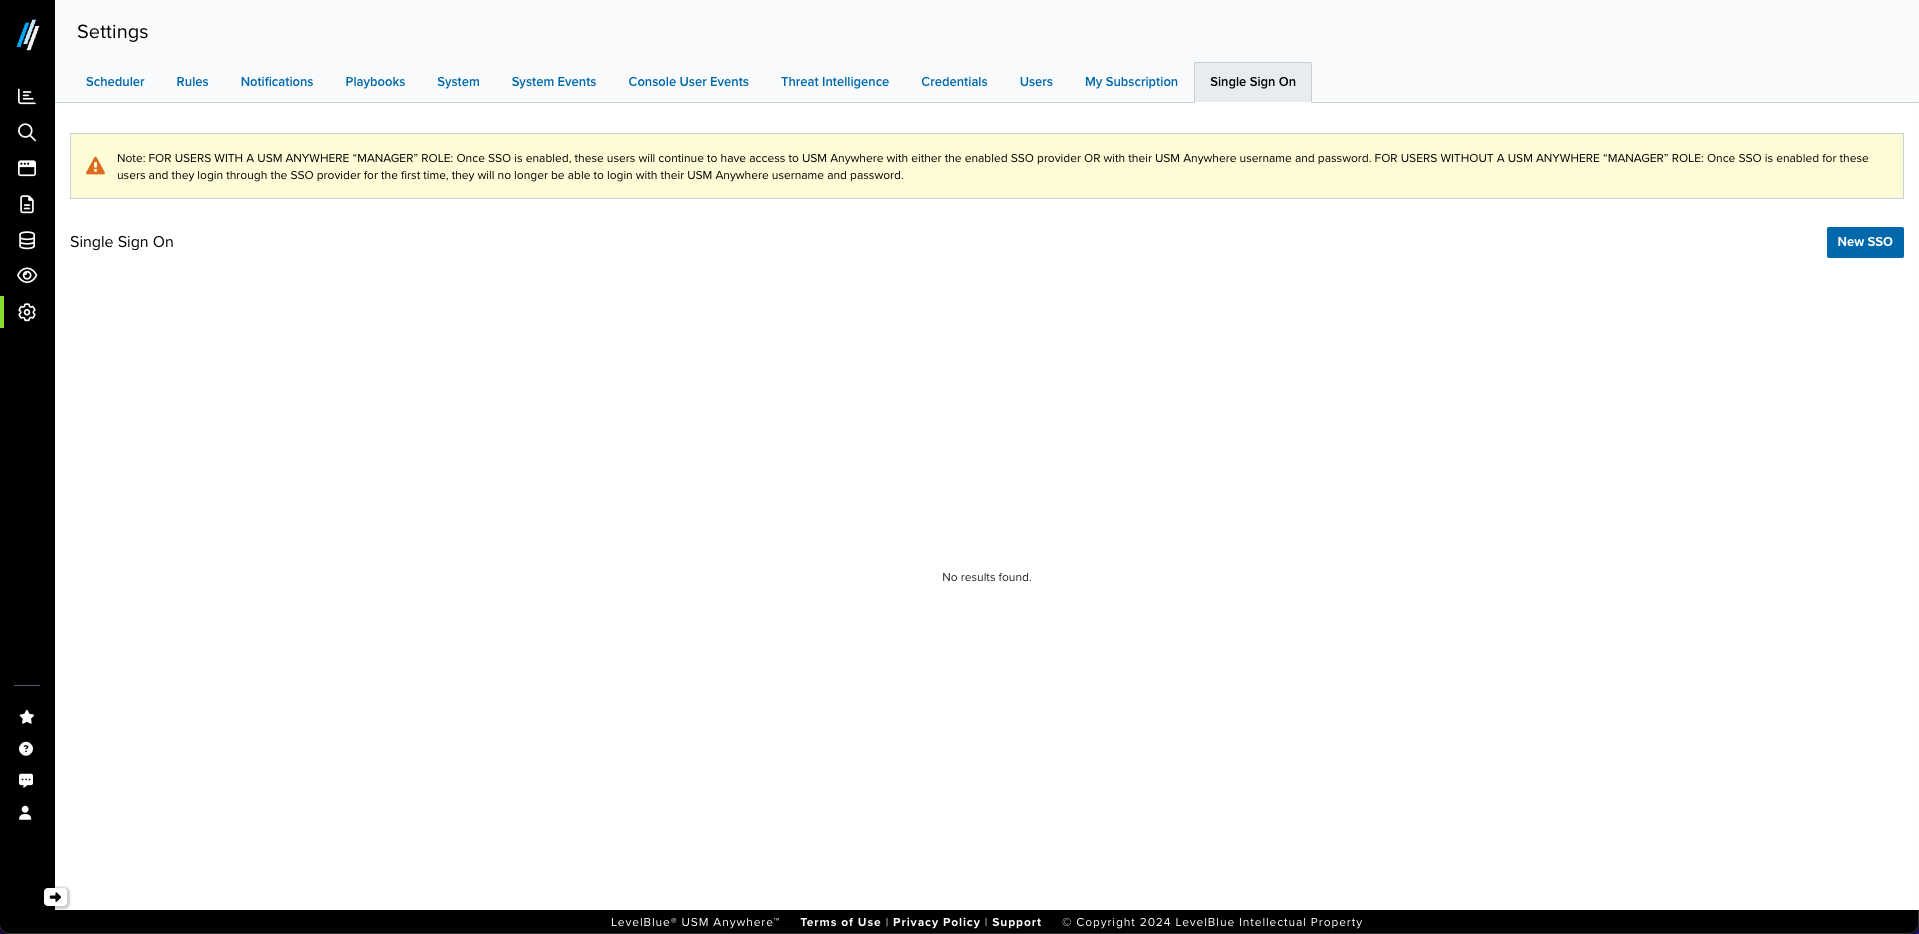 2. Click **New SSO**. The Add New SSO Configuration dialog box opens.
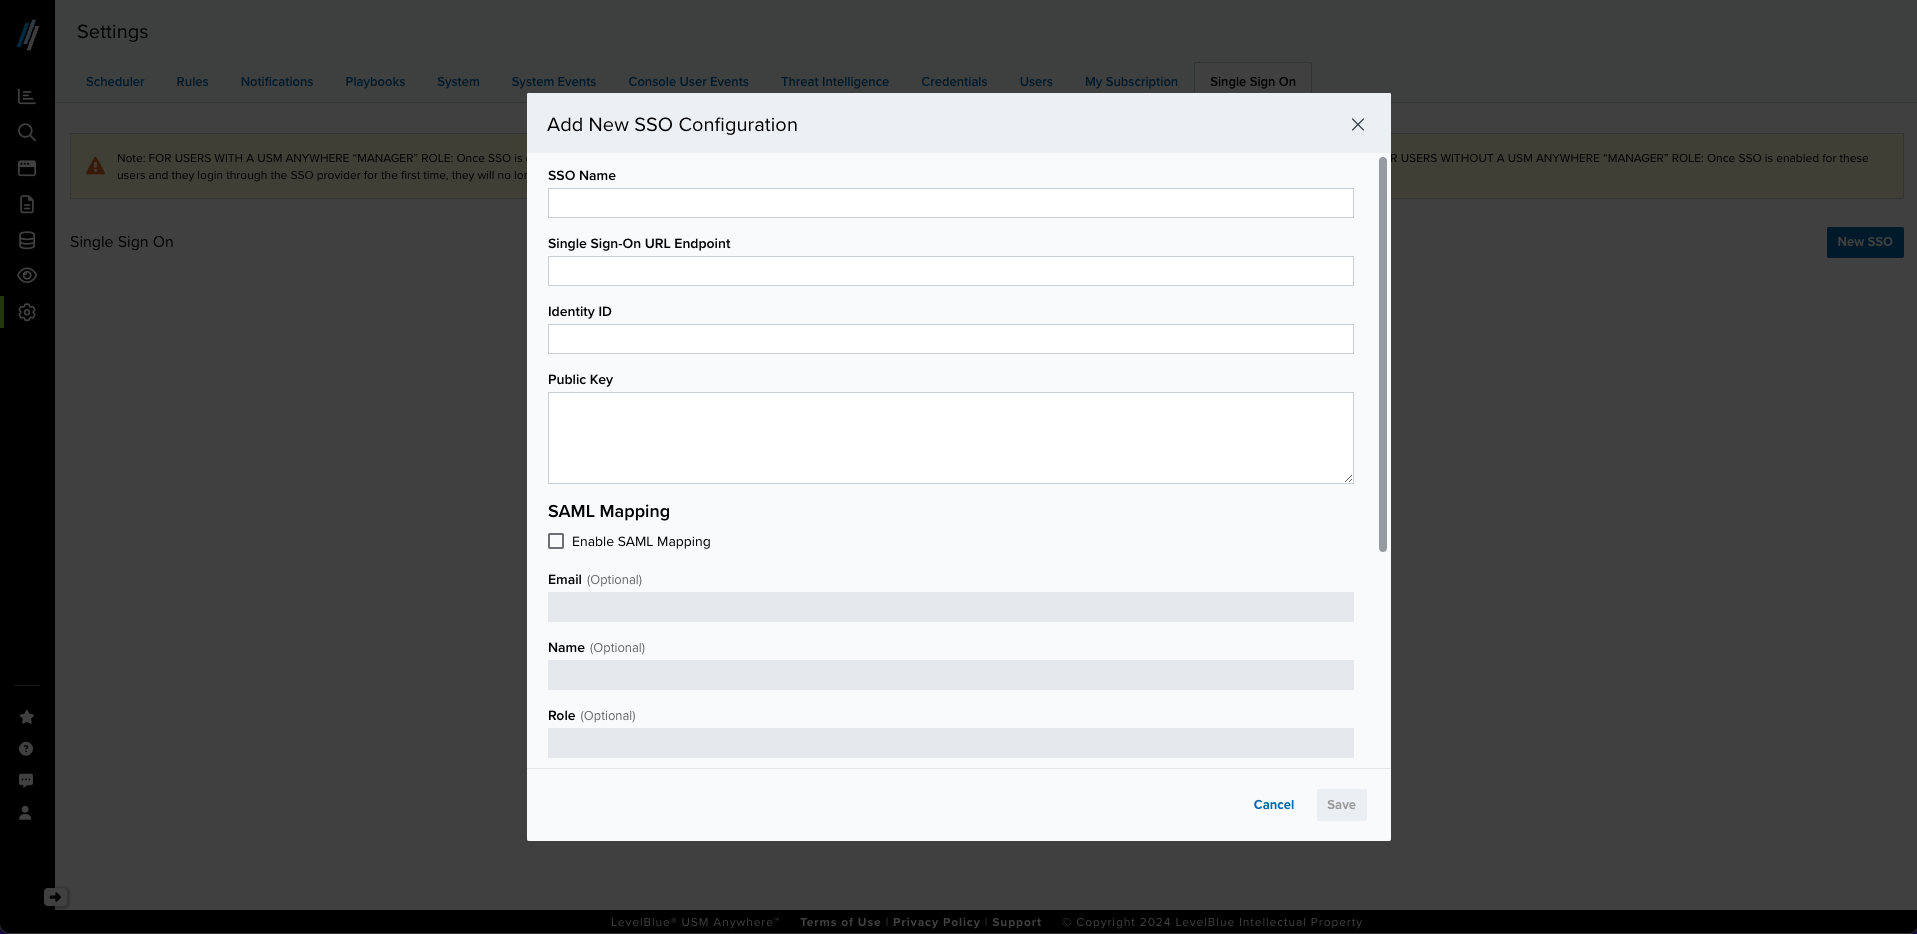 3. Enter the SSO configuration provided by your SSO vendor:
* **SSO Name:** You can enter the name you want; this name will be shown on the Login page.
* **Identity ID:** The vendor provides you with this information
* **Single Sign-On URL Endpoint:** The vendor provides you with this information
* **Public Key:** The vendor provides you with this information
4. Click **Save**.
3. Enter the SSO configuration provided by your SSO vendor:
* **SSO Name:** You can enter the name you want; this name will be shown on the Login page.
* **Identity ID:** The vendor provides you with this information
* **Single Sign-On URL Endpoint:** The vendor provides you with this information
* **Public Key:** The vendor provides you with this information
4. Click **Save**.
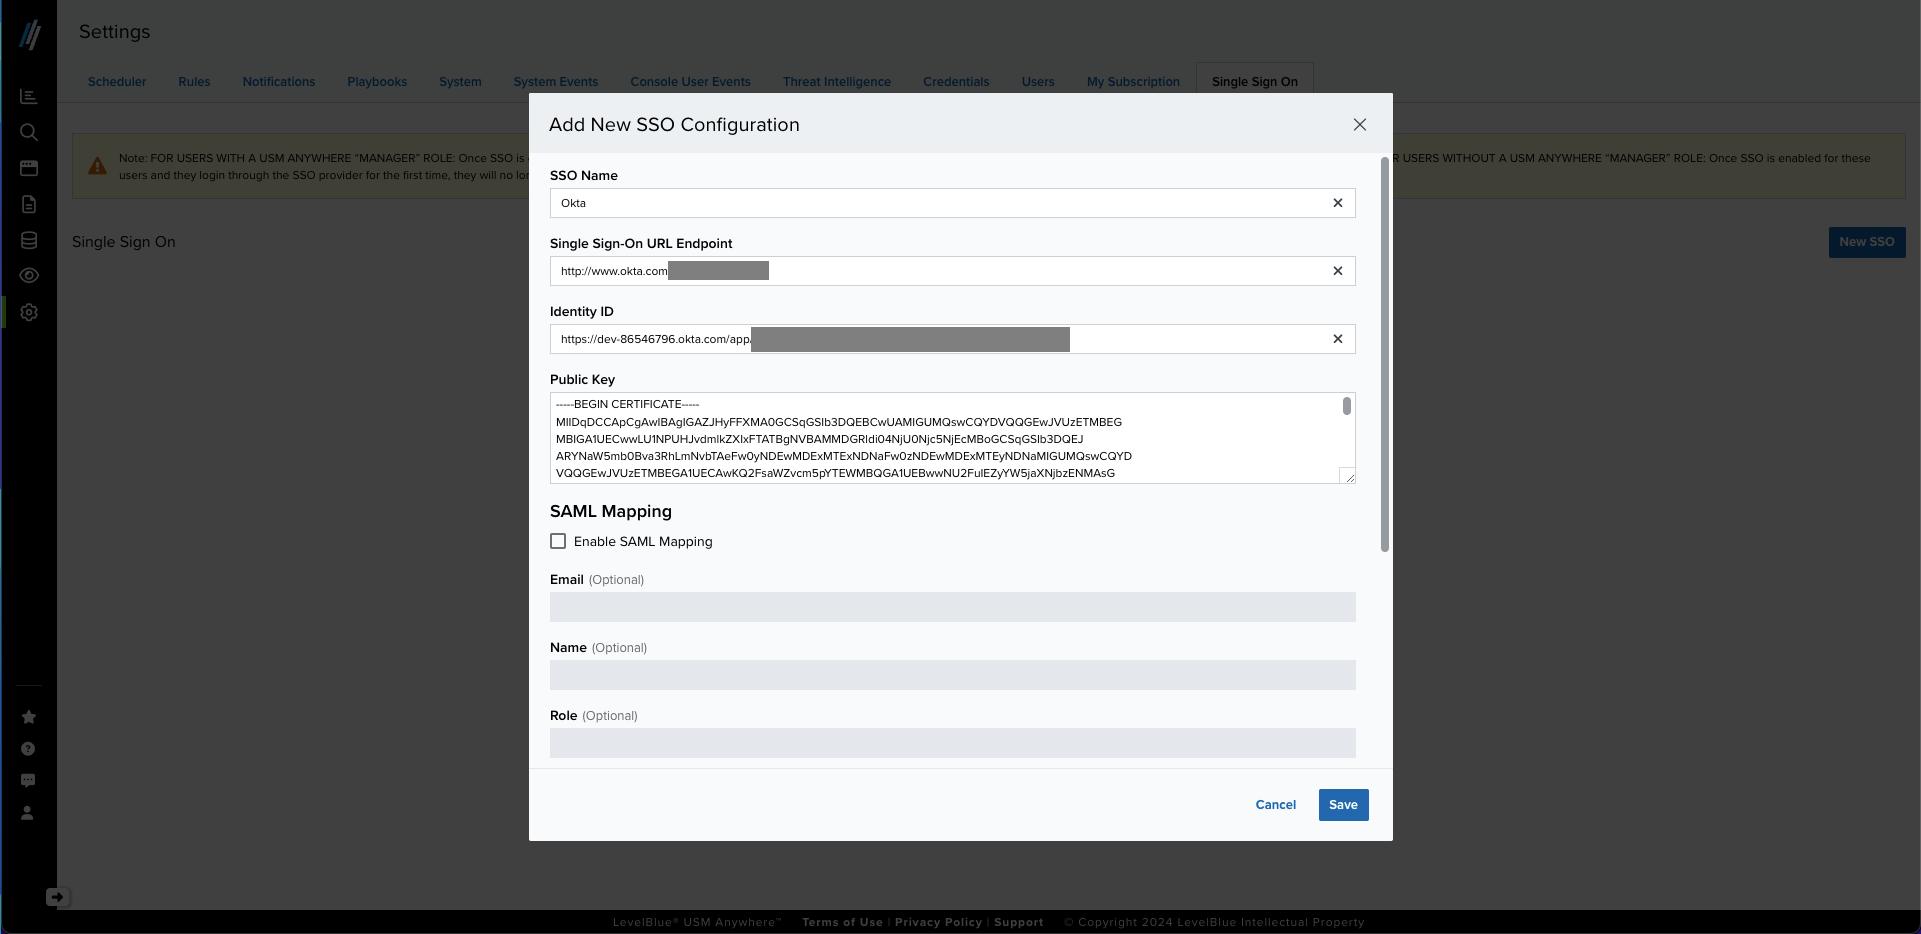 5. In the SSO Confirmation dialog box, click the checkbox to confirm your changes, and then click **Confirm**.
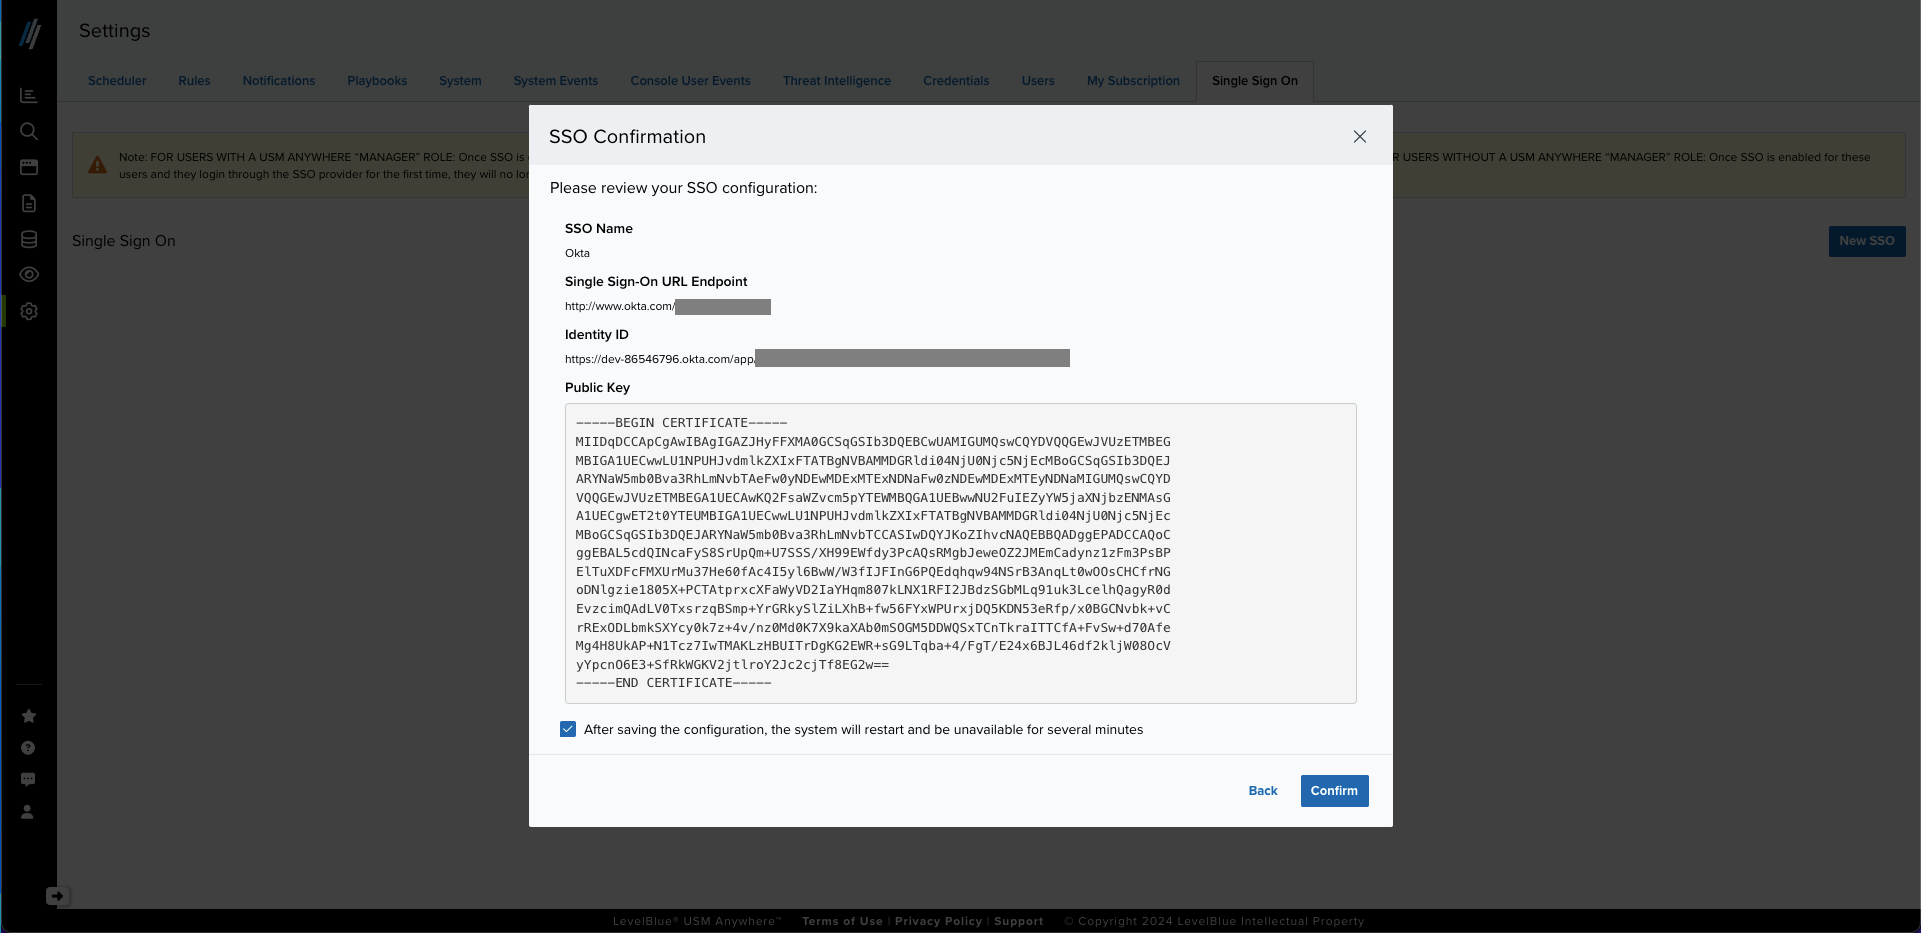 After successfully creating the new configuration, the system will be restarted to apply your changes. After the system restart, go to the Login page and see your new SSO configuration.
6. Go back to the SSO page, and then click the **View** button for your newly created SSO integration.
After successfully creating the new configuration, the system will be restarted to apply your changes. After the system restart, go to the Login page and see your new SSO configuration.
6. Go back to the SSO page, and then click the **View** button for your newly created SSO integration.
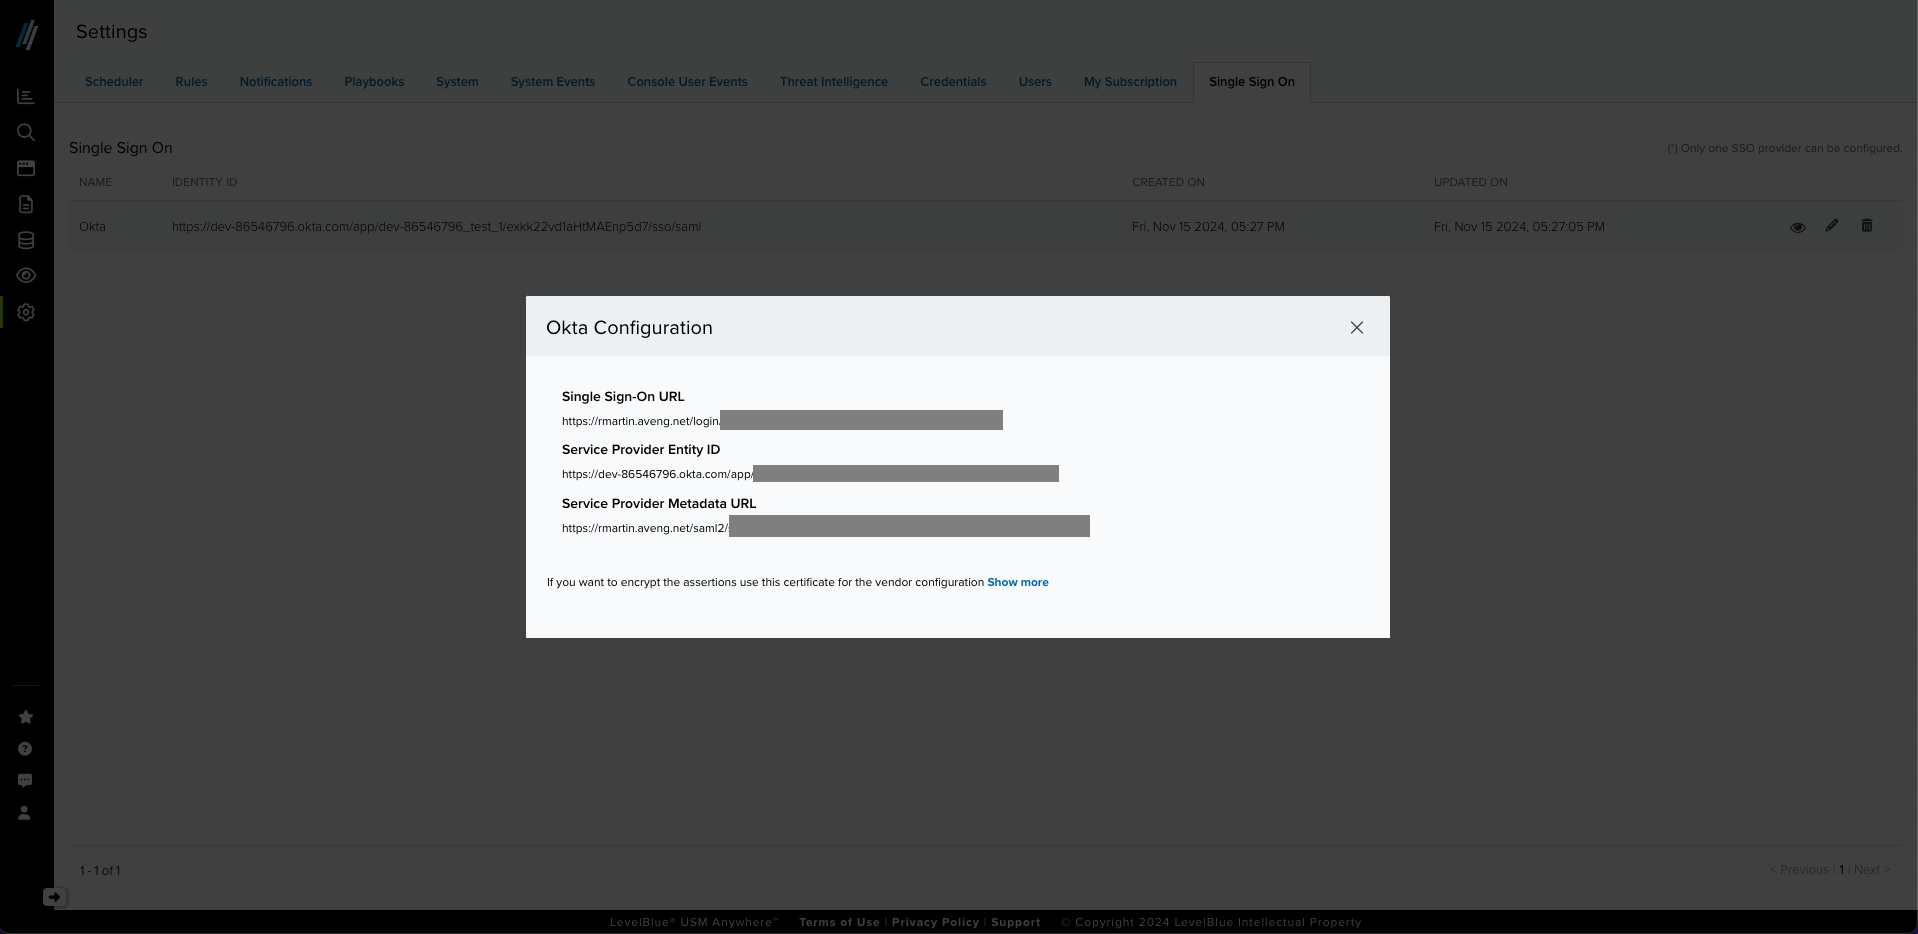 Use the information provided on the screen to configure the SAML settings in your SSO provider’s portal. The primary field to complete is the **Single Sign-On URL**; other fields may be optional depending on your provider’s requirements.
7. **(Optional)** If you want to encrypt the assertions, use the certificate by clicking **Show more**.
8. **(Optional)** Go to the Single Sign On page and click the **Edit** button. The Edit SSO Configuration dialog box opens.
Use the information provided on the screen to configure the SAML settings in your SSO provider’s portal. The primary field to complete is the **Single Sign-On URL**; other fields may be optional depending on your provider’s requirements.
7. **(Optional)** If you want to encrypt the assertions, use the certificate by clicking **Show more**.
8. **(Optional)** Go to the Single Sign On page and click the **Edit** button. The Edit SSO Configuration dialog box opens.
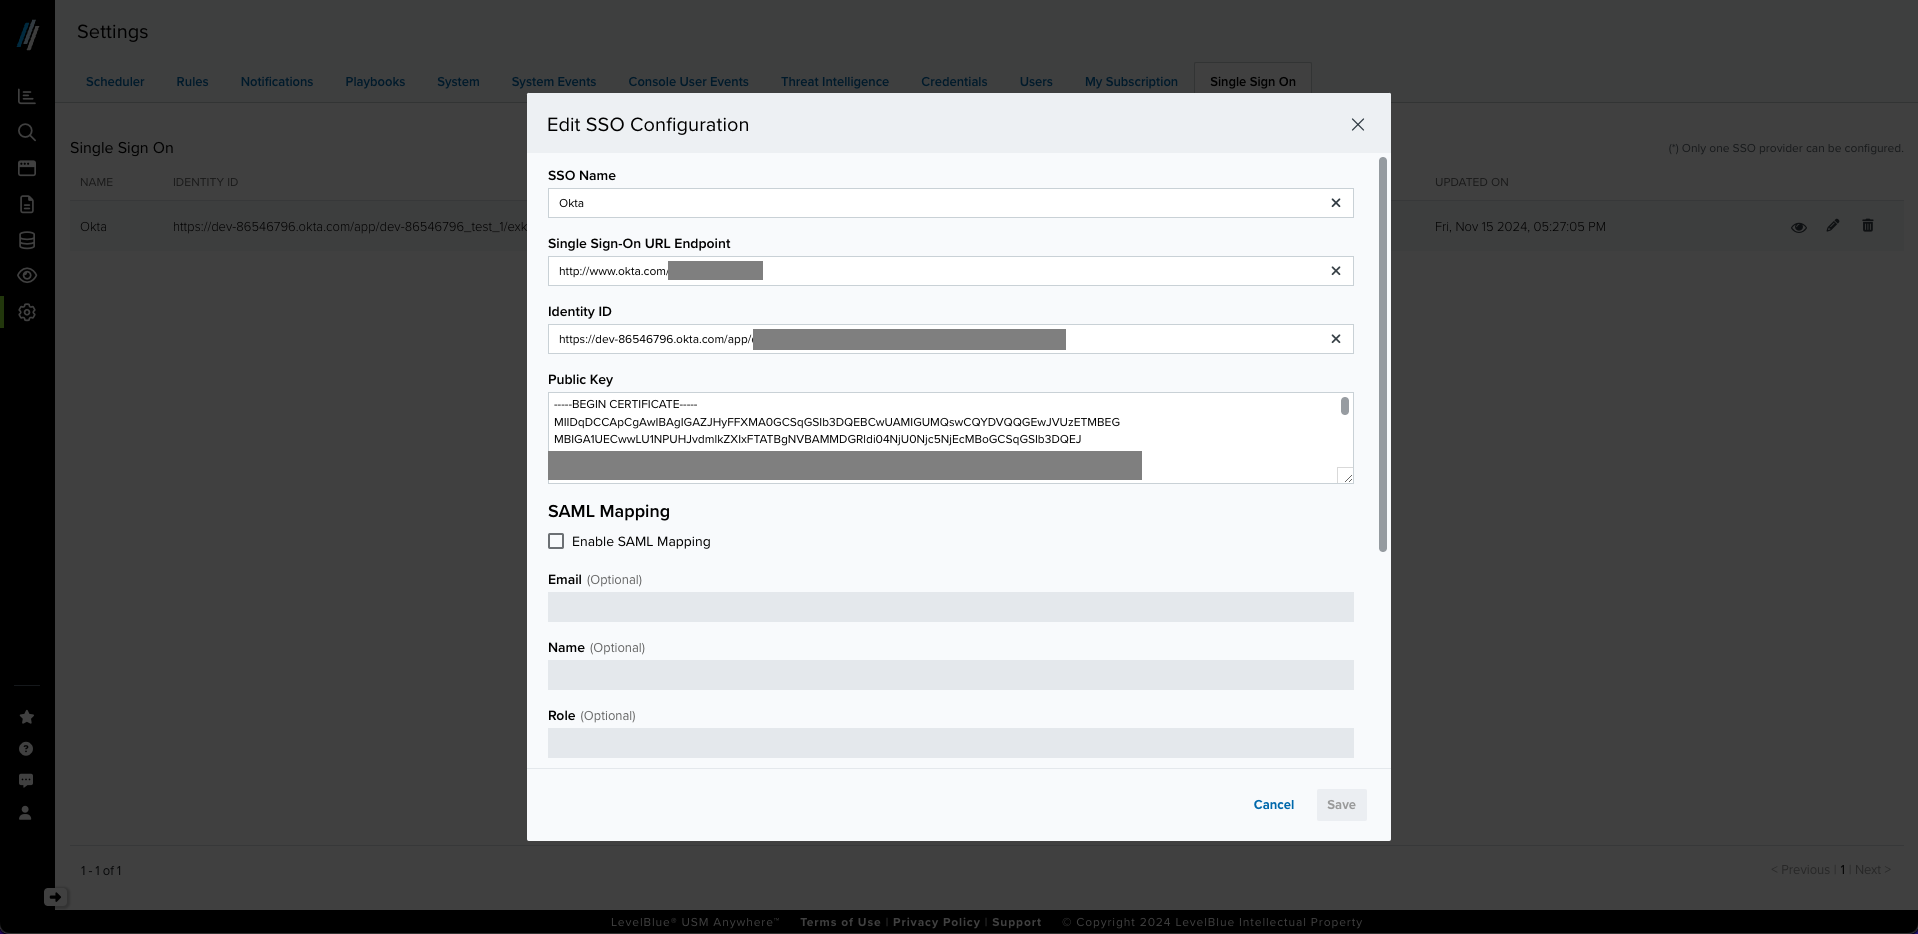 9. **(Optional)** If you need it, enable SAML Mapping. The mapping will depend on the information that is sent in your SSO vendor assertions.
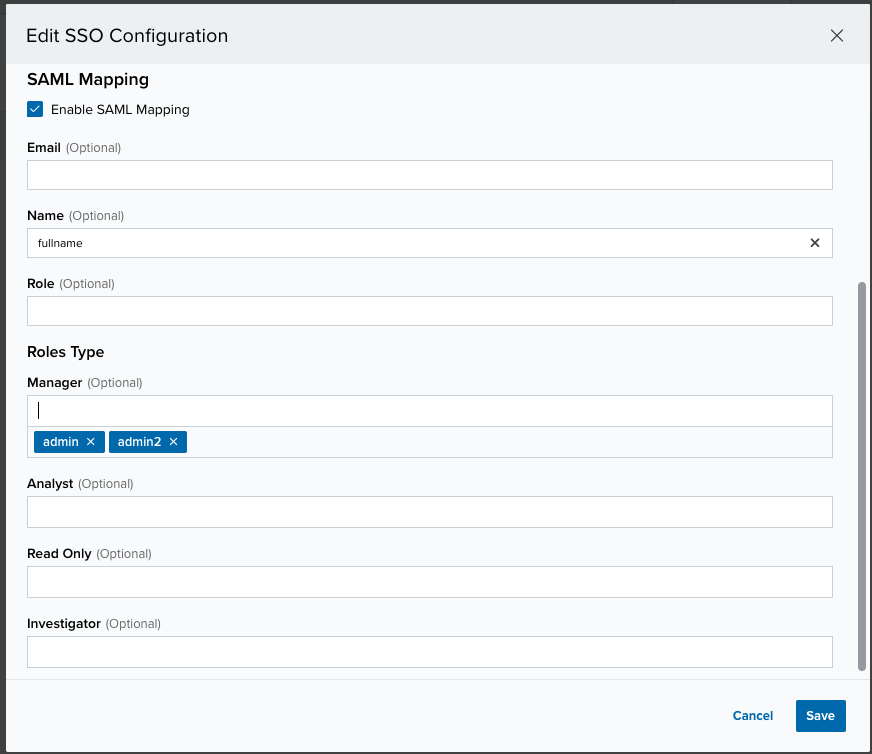 * You will have to add the value you use in your vendor if it does not correspond to the following:
* **Email:** email
* **Name:** fullName
* **Role:** roles
* Add role name mapping if you use roles other than USM Anywhere roles (You can add more than one role for a type, each entry has to be added by pressing enter). Roles Type from USM Anywhere:
* Manager
* Analyst
* Read Only
* Investigator
* If a user does not have a role assigned that maps to USM Anywhere’s roles, the user will be assigned the *Read Only* role.
10. **(Optional)** Enable the **SSO Required** option. Go to **Settings** > **System** > **SSO settings**. If this option is enabled, it forces all users to use the SSO to login. (Manager users can always login using their user/password) (Available from version 7.76).
* You will have to add the value you use in your vendor if it does not correspond to the following:
* **Email:** email
* **Name:** fullName
* **Role:** roles
* Add role name mapping if you use roles other than USM Anywhere roles (You can add more than one role for a type, each entry has to be added by pressing enter). Roles Type from USM Anywhere:
* Manager
* Analyst
* Read Only
* Investigator
* If a user does not have a role assigned that maps to USM Anywhere’s roles, the user will be assigned the *Read Only* role.
10. **(Optional)** Enable the **SSO Required** option. Go to **Settings** > **System** > **SSO settings**. If this option is enabled, it forces all users to use the SSO to login. (Manager users can always login using their user/password) (Available from version 7.76).