> ## Documentation Index
> Fetch the complete documentation index at: https://docs.levelblue.com/llms.txt
> Use this file to discover all available pages before exploring further.
# Creating Users
| | | | | |
| --------------------- | --------- | ------------ | ------- | ----------- |
| **Role Availability** | Read-Only | Investigator | Analyst | **Manager** |
Add a user account in your USM Anywhere environment for each member of your team that needs access. USM Anywhere implements role-based access control (RBAC). See [Role-Based Access Control (RBAC) in USM Anywhere](/documentation/usm-anywhere/user-guide/user-management/rbac) for more information.
**To create a user**
1. Go to **Settings > Users** to open the page.
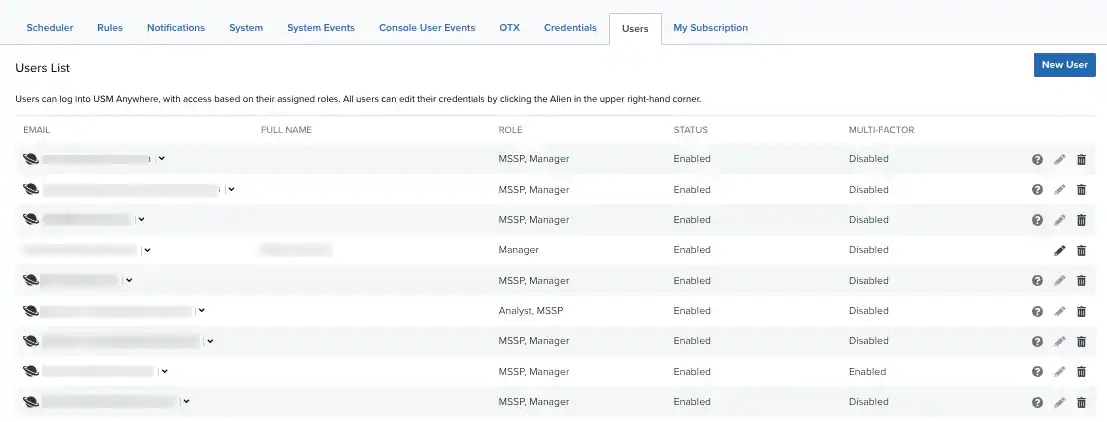 2. Click **New User**.
The Create User dialog box opens.
2. Click **New User**.
The Create User dialog box opens.
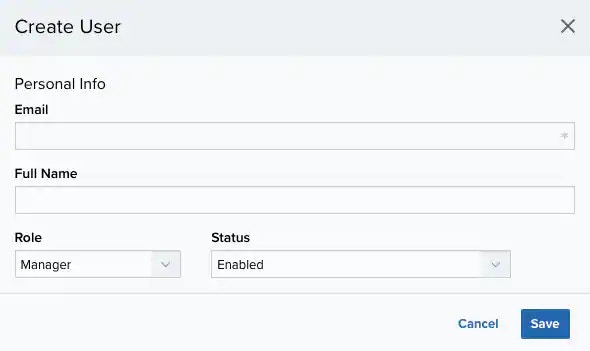 3. Enter the user's **Email** address and **Full Name**.
This is the email address used to verify the account and set the initial password.
4. Select the role you want to assign to the user. See [Role-Based Access Control (RBAC) in USM Anywhere](/documentation/usm-anywhere/user-guide/user-management/rbac) for more information.
5. Select the **Status** you want for the user.
Typically, you should keep the default **Enabled** status for a new user account.
6. Click **Save**.
USM Anywhere sends an email to the email address that includes a link to set a password and login.
The password reset link will be valid for the next 24 hours. If you do not click the reset link within that period of time, USM Anywhere will display a message:
3. Enter the user's **Email** address and **Full Name**.
This is the email address used to verify the account and set the initial password.
4. Select the role you want to assign to the user. See [Role-Based Access Control (RBAC) in USM Anywhere](/documentation/usm-anywhere/user-guide/user-management/rbac) for more information.
5. Select the **Status** you want for the user.
Typically, you should keep the default **Enabled** status for a new user account.
6. Click **Save**.
USM Anywhere sends an email to the email address that includes a link to set a password and login.
The password reset link will be valid for the next 24 hours. If you do not click the reset link within that period of time, USM Anywhere will display a message:
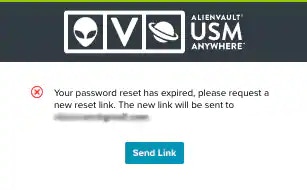 You need to click Send Link to receive a new email with a new password reset link.