The HIPAA Control §164.312(c)(1) Integrity - Windows - File System Events report generated from this template provides details on whether your practice has data authentication mechanisms and tools, such as checksum; and if your practice relies on encryption validation to authenticate ePHI.
Checksum is a computation that is introduced when an ePHI is transmitted or stored. The computation is checked again at a later time (such as when the ePHI is recalled or received at the intended destination) to ascertain whether the computations match. If the checksum matches, then it is less likely that the ePHI has been altered or modified.
- Identification of all users who are authorized to access ePHI
- Identification of possible unauthorized sources that may intercept and modify ePHI
- Development of integrity policy and requirements
- Implementation of procedures to address requirements
- Implementation of mechanisms to authenticate ePHI
- Establishiment of a monitoring process to assess how the operational process works
To generate the HIPAA Control §164.312(c)(1) Integrity - Windows - File System Events report
- Go to Reports > Compliance Templates.
- On the left navigation pane, click HIPAA.
- Click Generate Report on the specific line for this report. The Configure Report dialog box appears.
- Click Edit Filters if you want to modify the selected filters, and then click Continue to Filters.
- Make the required modifications, and then click Edit Report.
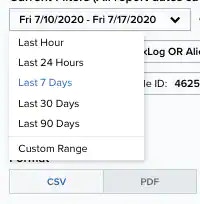
-
Click the date field if you want to choose a different date range. Select Last Hour, Last 24 Hours, Last 7 Days, Last 30 Days, Last 90 Days, or Custom Range to set a particular date range.
- Select the Format of the report. It can either be CSV or PDF.
- Select a Schedule for the report if you want to generate it again: Daily, Weekly, Bi-weekly, and Monthly. Otherwise, select Never.
- Enter an email address in which to send the report. You may also select the Send to my Email Address option to add your email address automatically.
-
Select the Enable link expiration option.
This link is delivered by email and expires in 14 days.
- Click Next.
- In the Report Name field, enter a name for the report. This name will be displayed on the Saved Reports page.
- (OPTIONAL) Enter a Report Description.
- Under the Number of Records section, select the maximum number of records to include in the report: 20, 50, 100, 500, 1000, or 2500.
-
If you have previously chosen the PDF format, you will see the Graphs section, which you can use to include additional views. You can add to or remove graphs from the report by clicking the
 and
and  icons.
- Click Run to run the report.