In this example, an orchestration rule is created to generate an alarm whenever a user, who is included in a correlation list, generates an event.
Note: See Correlation Lists for more information.
- Go to Settings > Rules > Correlation Lists.
- Click New List.
- Enter a name for the correlation list in the Name field and, if desired, a description to clarify its use in the Description field.
- Click Add Item to include the user names to your list.
- Click Save.
- Go to Settings > Rules.
- Click Create Orchestration Rule > Alarm Rule.
- Select a Boolean operator. The options are AND, OR, AND NOT, and OR NOT.
-
Select a packet type in the Match drop-down list.

- Logs: Use this packet type for event-based rules.
- Configuration Issues: Use this packet type for configuration issues-based rules.
- Vulnerabilities: Use this packet type for vulnerabilities-based rules.
- System Events: Use this packet type for system events-based rules.
- Console User Events: Use this packet type for console user events-based rules.
- Alarms: Use this packet type for console user alarms-based rules.
-
Click Add Conditions and select these property values.
-
(Optional.) Click Add Group to group your conditions.
Note: See Operators in the Orchestration Rules for more information.
- In the Occurrences text box, enter the number of event occurrences that you want to produce a match on the conditional expression to trigger the rule. You can enter the number of occurrences or use the arrows to scroll the value up or down. You can enter a number between 1 and 100.
-
Click Next.
- Enter a name for the rule (for instance “Alarm for undesirable users”) and, if desired, a description to clarify its use in the Description field.
- Select an intent. The intent describes the context of the behavior that is being observed. These intents roughly map to the stages of the intrusion kill chains but are collapsed to ensure that each is discrete. See Intent for more information about the available threat categories.
-
Enter a method.
If known, it is the method of attack or associated with the indicator that generated the alarm.
Note: This is a required field; if you do not complete this field, the Save button remains inactive.
- Select a strategy. The strategy describes the broad-based strategy or behavior that is detected. The intention is to describe the user’s strategy to achieve their goal.
- Enter a priority. See Priority Field for Alarms for more information.
- Configure a mute duration set in seconds, minutes, and hours.
Note: Take care to set a mute duration that is long enough to cover the span of time in which matching events will occur to maximize the efficacy of your mute.
-
In the Length text box, specify the timespan that you want to use to identify a match for multiple occurrences. Enter the number in the text box, and then use the drop-down menu to select a value of seconds, minutes, or hours.
This duration identifies the amount of time that transpires from the beginning to the end of the occurrence. If the number of occurrences is not met within this period, the rule is not a match.
Note: Your defined length and occurrences function together to specify the number of occurrences within a time period that will produce a match for the rule. For example, you can define a rule to trigger an for an attempt when a failed occurs three times within a five-minute window.
-
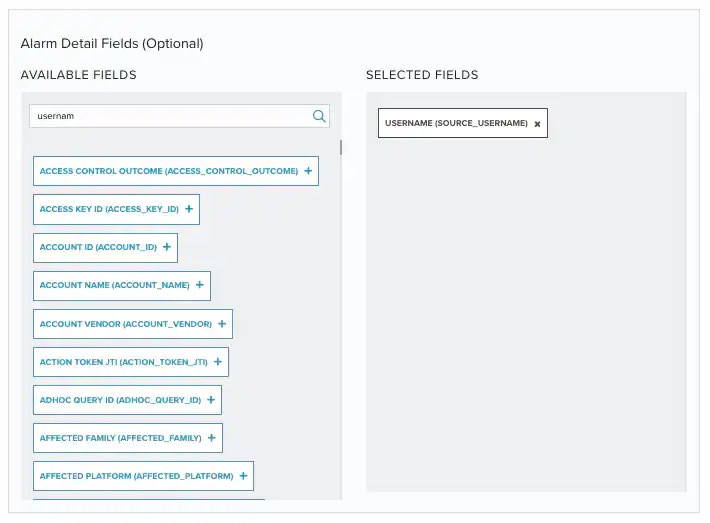
(Optional.) Select the fields that you want to display in the generated alarm.
You can select or remove the fields you want to include in the details of the alarm by clicking the
 and the
  icons.
- Click Save. The created rule displays in the list of rules. You can see it from Settings > Rules. See Orchestration Rules for more information.