-
Open your virtualization management console and connect to the USM Anywhere Sensor virtual machine (VM).
Important: Alternatively, you can open an SSH session to the sensor VM. When using an SSH session, the default username is sysadmin.If you are accessing a Microsoft Azure Sensor through SSH and you specified a username other than the default (sysadmin) for your SSH access, you must use the following commands at the command line to “sudo up” and access the sensor console:
-
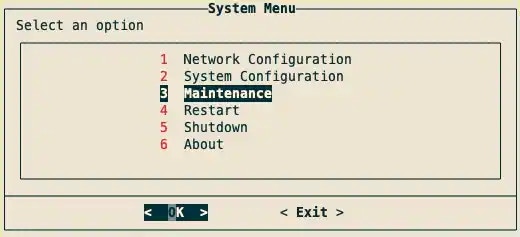
From the USM Anywhere Sensor console System Menu, select Maintenance and press Enter.
-
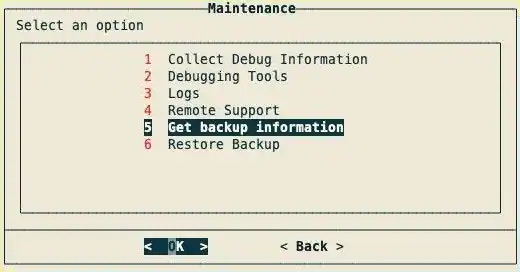
From the Maintenance menu, select Get Backup Information and press Enter.
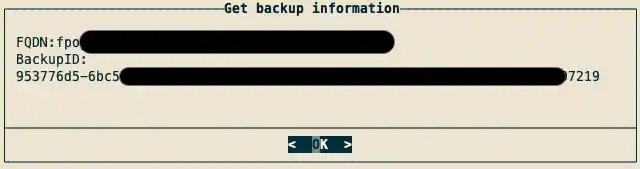
The FQDN and BackupID will appear.
-
Copy the FQDN and BackupID, and save them for later use.
-
Go to the USM Anywhere Sensors page and download the latest version of the USM Anywhere Sensor software.
Note: Make sure to select the version that is compatible with your platform to ensure functionality.
-
Connect to the USM Anywhere Sensor VM as you did in step 1 to shutdown the old sensor.
Important: The old sensor running Ubuntu 20.04 must be shutdown to prevent network collisions and ensure a seamless transition to Ubuntu 22.04.
-
From the USM Anywhere Sensor console System Menu, select Shutdown and press Enter.
A dialog box appears to confirm the shutdown.

- Select Yes and press Enter.
-
Deploy the new sensor on the desired platform.
Deployment guides providing detailed instructions on how to deploy each sensor type can be found on the USM Anywhere Sensors page.
Important: Make sure your new sensor is deployed with identical hardware configurations as the old sensor, including virtual private clouds (VPCs), network interfaces, and other relevant settings.
- Connect to the USM Anywhere Sensor VM as you did in step 1 to restore the backup to the new sensor.
-
From the USM Anywhere Sensor console System Menu, select Maintenance and press Enter.
-
From the Maintenance menu, select Restore Backup and press Enter.

- Enter the FQDN from step 4 and press Enter.
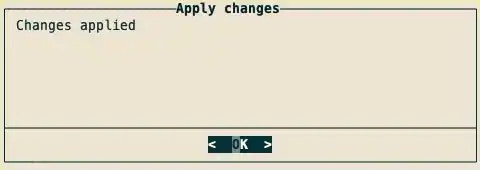
- Enter the BackupID from step 4 and press Enter. A progress bar will appear. Once it has completed, a dialog box confirming changes have been applied will appear.
-
Press Enter.
Your new sensor should now be connected.
-
Verify the new sensor is connected and working by checking the following:
- The new sensor is reporting new events.
- The network is configured as you want.
- The new sensor is processing syslog events (if applicable).
- The new sensor is processing network-based intrusion detection (NIDS) traffic (if applicable).
- Delete the old sensor once you have verified the new sensor is working. See Deleting a Sensor for more information.
Upgrading Your Sensor Resources
Migrating a Sensor from Ubuntu 18.04 to Ubuntu 20.04
LevelBlue recommends upgrading any Ubuntu 18.04 sensors to Ubuntu 20.04. Migrating to Ubuntu 20.04 ensures you are running the latest and most secure version of the sensor.
USM Anywhere automatically creates a backup for each sensor once a week, and these backups can be used to migrate your sensors to the latest version of Ubuntu.
To migrate a sensor from Ubuntu 18.04 to Ubuntu 20.04
⌘I