Sensor Backups
Each sensor in USM Anywhere is configured to automatically create a backup and send it to the cloud once a week. This ensures the latest version of your configuration is securely stored off site. Each backup is retained for 30 days to efficiently manage storage space. Sensor backups are restored from the most recently saved version of that sensor’s configuration.Restoring Your Sensor Using a Backup
In the event that you experience a downed or damaged sensor, USM Anywhere enables you to use the information from the automatic sensor backups to restore a sensor from its latest saved version. To restore a sensor using a backup- Open your virtualization management console and connect to the USM Anywhere Sensor virtual machine (VM).
-
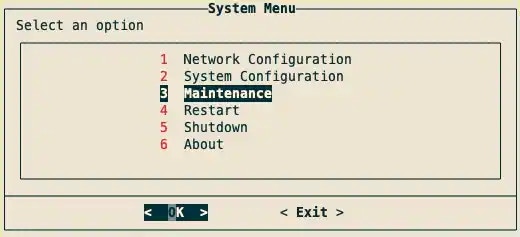
From the USM Anywhere Sensor console System Menu, select Maintenance and press Enter.
-
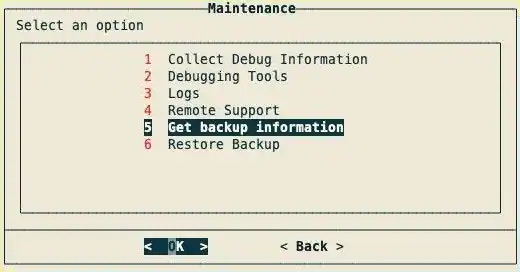
From the Maintenance menu, select Get Backup Information and press Enter.
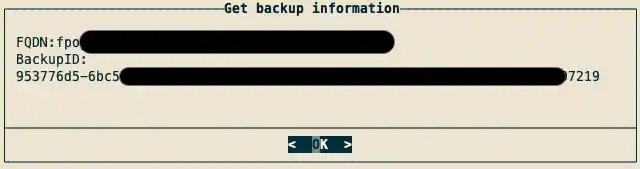
The FQDN and BackupID will appear.
-
Copy the FQDN and BackupID, and save them for later use.
- Connect to the USM Anywhere Sensor VM as you did in step 1.
-
From the USM Anywhere Sensor console System Menu, select Maintenance and press Enter.
-
From the Maintenance menu, select Restore Backup and press Enter.

- Enter the FQDN from step 4 and press Enter.
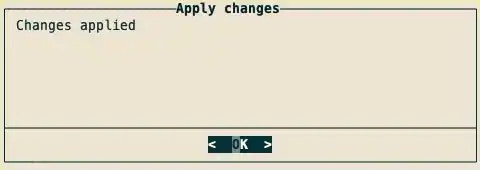
- Enter the BackupID from step 4 and press Enter. A progress bar will appear. Once it has completed, a dialog box confirming changes have been applied will appear.
-
Press Enter.
Your sensor will now be restored.