If you want to collect logs from other log groups, ensure that all streams in the same group are of the same type so that USM Anywhere can use a designated data source to parse the collected raw log data. You can then set up a CloudWatch log collection job for each log group.
To create a new CloudWatch log collection job
- Go to Settings > Scheduler.
-
In the left navigation menu, click Log Collection.
Note: You can use the Sensor filter at the top of the list to review the available log collection jobs on your AWS Sensor.
-
Click Create Log Collection Job.
 The Schedule New Job dialog box opens.Note: If you have recently deployed a new USM Anywhere Sensor, it can take up to 20 minutes for USM Anywhere to discover the various log sources. After it discovers the logs, you must manually enable the AWS log collection jobs you want before the system collects the log data.
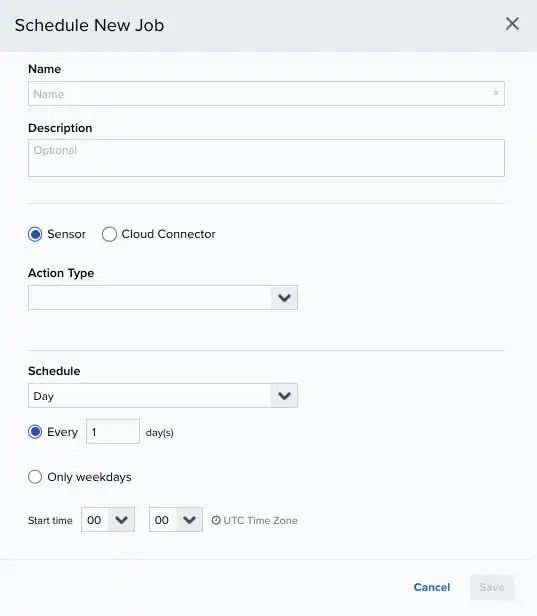
- Enter the name and description for the job. The description is optional, but it is a best practice to provide this information so that others can easily understand what it does.
- Select Sensor as the source for your new job.
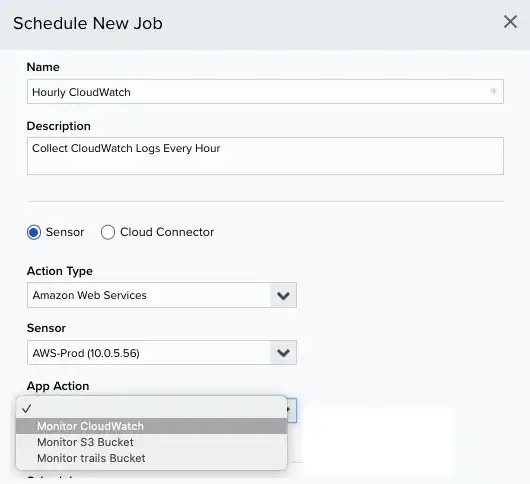
- In the Action Type drop-down list, select Amazon Web Services.
-
In the App Action drop-down list, select Monitor CloudWatch.
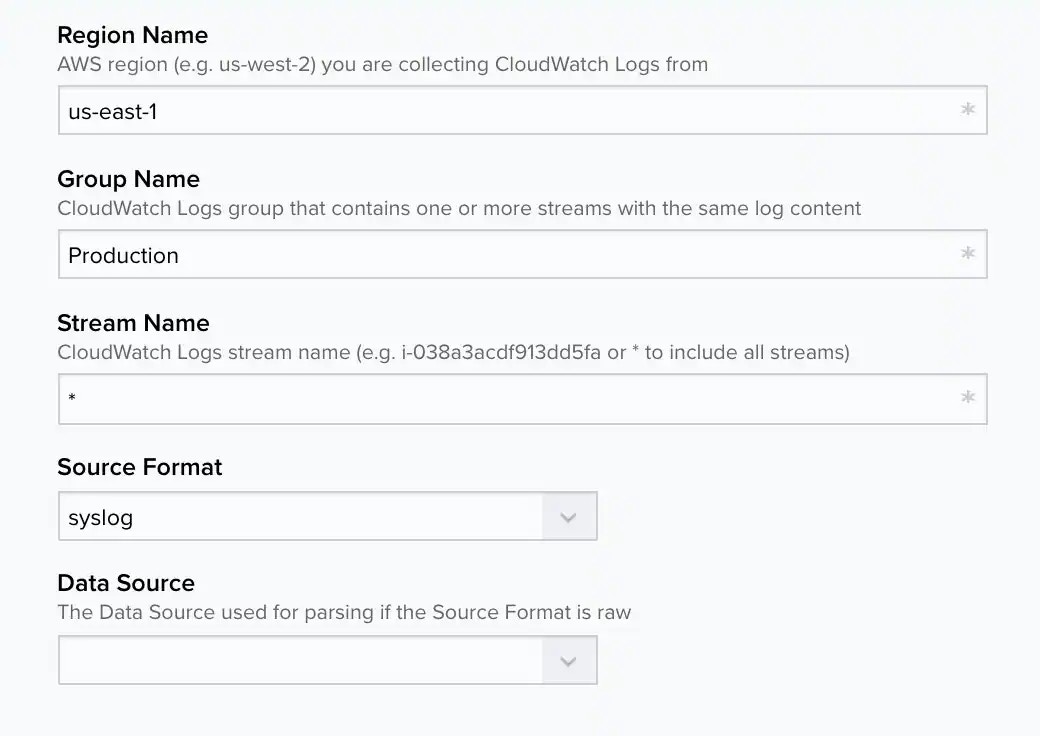
- Enter the Region Name, Group Name, and Stream Name information for your AWS account. Region name can be an asterisk ( * ) to monitor all regions for a given group.
-
In Source Format, select either of the following log formats:
- Syslog: All messages transmitted to USM Anywhere are processed with the assumption that they are syslog formatted. When you choose syslog as the source format, the data source selection is bypassed and USM Anywhere uses the auto-detect hints from the data sources to match the incoming messages to the correct data source.
-
Raw: Use for non-syslog formatted data.
If you select this option, you must choose the data source that USM Anywhere will use to parse all of the streams in the group. For example, to collect Amazon Virtual Private Cloud (VPC) flow logs, select the VPC Flow Logs data source.
-
In the Schedule section, specify when USM Anywhere runs the job:
a. Select the increment as Minute, Hour, Day, Week, Month, or Year.
b. Set the interval options for the increment. The selected increment determines the available options. For example, on a weekly increment, you can select the days of the week to run the job.Warning: After a frequency change, monitor the system to check its performance. For example, you can check the system load and CPU. See USM Anywhere System Monitor for more information.Or on a monthly increment, you can specify a date or a day of the week that occurs within the month.
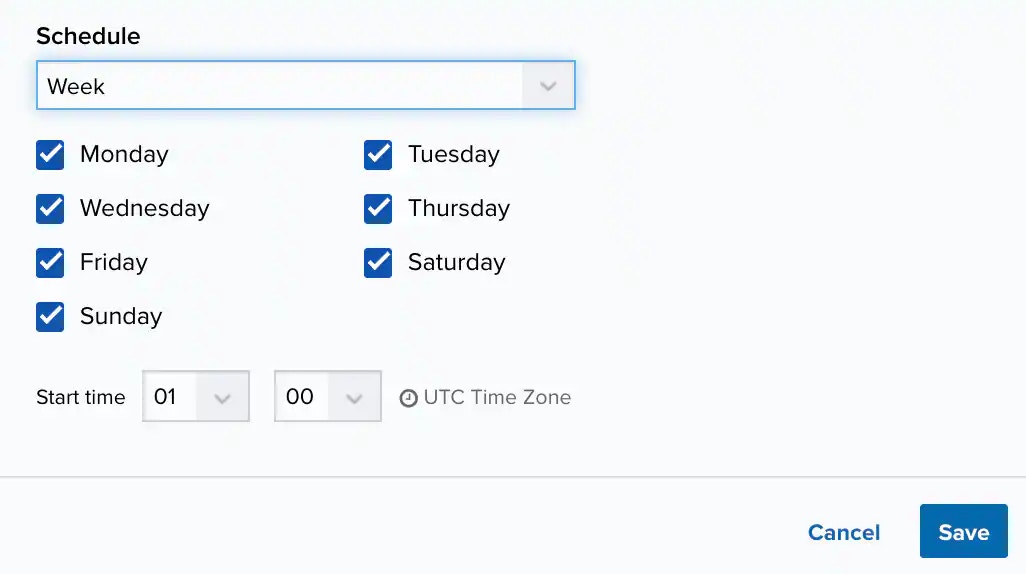 c. Set the start time. This is the time that the job starts at the specified interval. It uses the time zone configured for your USM Anywhere instance (the default is Coordinated Universal Time [UTC]).
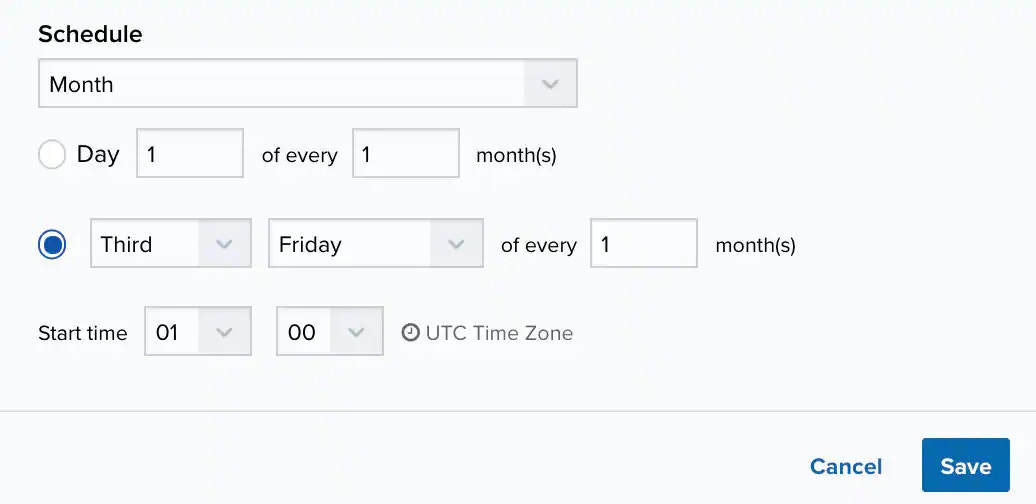
- Click Save. USM Anywhere detects any enabled jobs with the same configuration and asks you to confirm before continuing. This is because having two jobs with the same configuration generates duplicate events and alarms.

Related Video Content