BlueApp for ServiceNow Requirements
You or your ServiceNow administrator must create a user account in your ServiceNow instance to be used by USM Anywhere through the ServiceNow Representational State Transfer (REST) APIs. This user account must have rights to perform create, read, update, and delete (CRUD) operations using the ServiceNow Table API and ServiceNow Aggregate API. If you are using the ServiceNow Security Incident Response (SIR) application and want the BlueApp for ServiceNow to create new security incidents, this user must also have the sn_si.integration_user or sn_si.admin role. If you choose to use OAuth, you must create an endpoint for BlueApp for ServiceNow to access your ServiceNow instance. See ServiceNow Product documentation for more details.It is a best practice to have a user account configured in your ServiceNow instance that can be used exclusively for USM Anywhere. With this exclusive user account, you can easily filter incidents in the ServiceNow user interface (UI) to display incident tickets created by USM Anywhere. Also, the incidents created by the BlueApp for ServiceNow and its history are displayed in USM Anywhere according to this username. By using an exclusive user account, this information will be confined to the USM Anywhere alarm, vulnerability, and event responses.If you are a service provider or enterprise that manages more than one USM Anywhere instance, you can configure the BlueApp for ServiceNow on each instance to connect to the same ServiceNow environment. In this case, you should create a unique user account to be used by each USM Anywhere instance so that you can not only differentiate them in the ServiceNow UI, but also separate the history and incident information displayed in USM Anywhere by the instance.
- Fully-qualified domain name (FQDN) for your ServiceNow instance
- Username and password to use for USM Anywhere access
- (OAuth only) ServiceNow client identification (ID)
- (OAuth only) ServiceNow client secret
You can get these required credentials from 1Password.
Configuring ServiceNow Connection in USM Anywhere
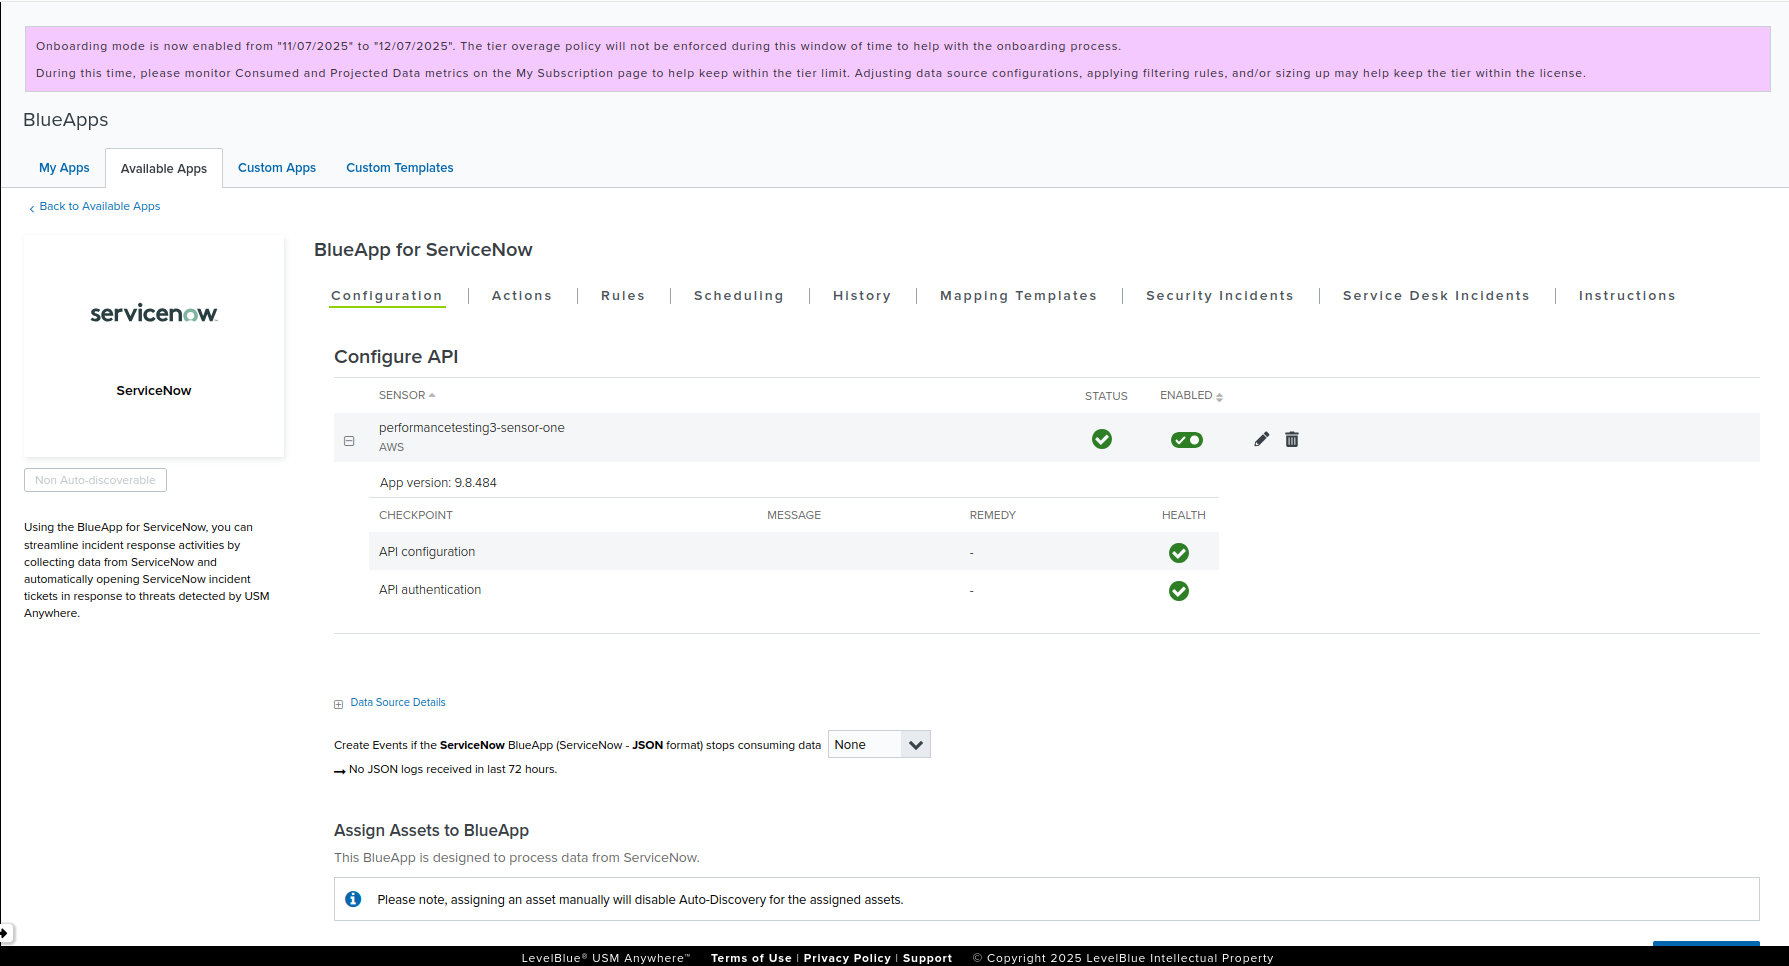
To support the ServiceNow response actions in USM Anywhere, you must configure a connection with the ServiceNow instance. This connection enables the BlueApp to perform CRUD operations using the ServiceNow Table and Aggregate REST APIs. To configure the ServiceNow connection- In USM Anywhere, go to Data Sources > BlueApps > Available Apps.
- Search for ServiceNow, and then click the tile.
- In the Configuration tab, click Configure API.
-
If you have more than one deployed USM Anywhere Sensor, select the sensor that you want to use for the enabled BlueApp.
BlueApps operate through a deployed sensor and use APIs to integrate with the connected third-party technology. Select the sensor that can access the integration endpoint. The HTTPS connections to the API will originate from this sensor; therefore, it is important to ensure the sensor has network access to the BlueApp API endpoints.
-
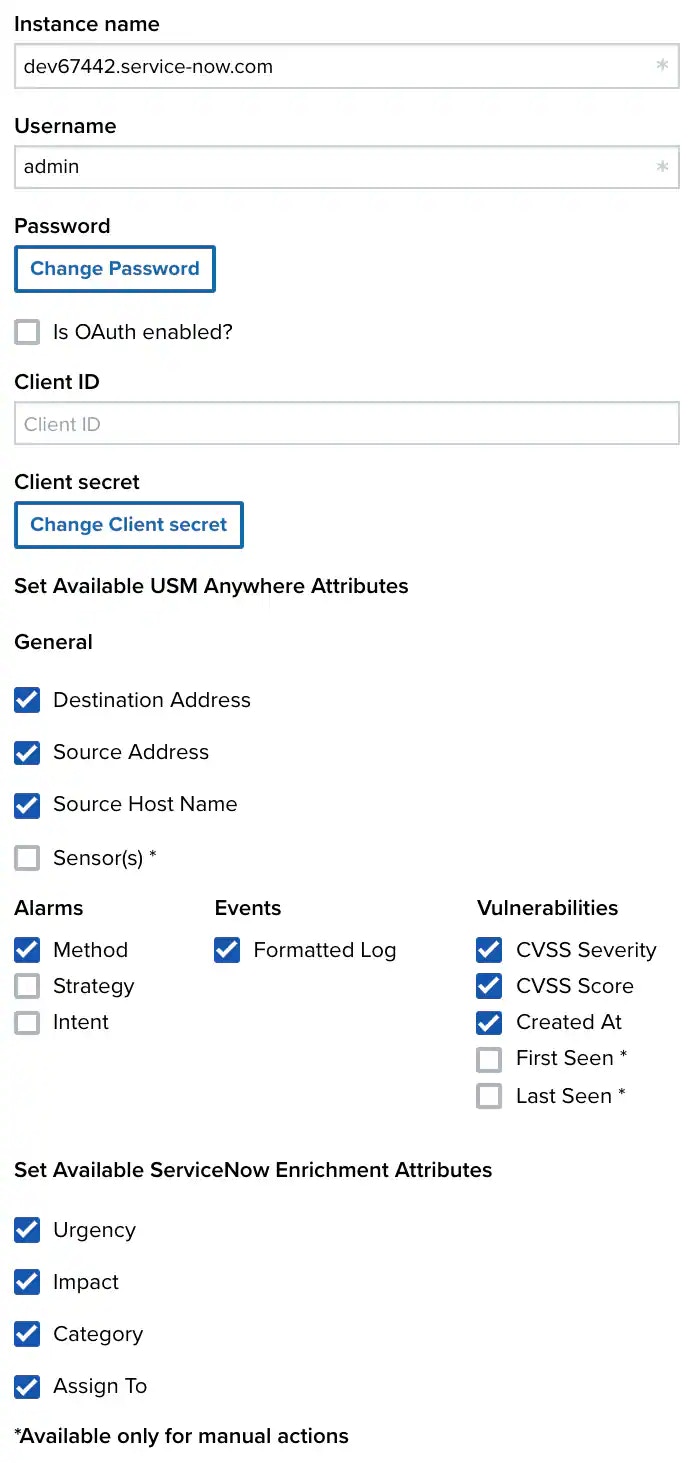
Specify the basic connection information for ServiceNow:
- Instance name: Enter the FQDN for your ServiceNow instance. For example, if you access your ServiceNow instance at https://mycorp.service-now.com, you must enter mycorp.service-now.com in this field.
- Username: Enter the username for the account that USM Anywhere will use to access ServiceNow.
- Password: Enter the password for the account.
-
(OAUTH ONLY) Specify the OAuth authentication parameters:
- Is OAuth enabled?: Select this checkbox to use OAuth for the ServiceNow connection.
- Client ID: Enter the client ID that is configured in the ServiceNow OAuth Application Registry.
- Client secret: Click Change Client secret to enter the client secret for the client ID.
-
In the Set Available USM Anywhere Attributes section, select the checkboxes for the options you want to be available for populating the Incident descriptions in ServiceNow. These options should be available when you create a response action rule.
- Click Save.
-
Verify the connection.
After USM Anywhere completes a successful connection to the ServiceNow instance and the APIs, a green checkmark icon
 is shown in the Health column.
Otherwise, a warning icon
is shown in the Health column.
Otherwise, a warning icon  is displayed if there is a problem with the connection. The Message column provides information about the issue. Repeat the steps to fix the configuration or troubleshoot your ServiceNow connection.
Log Collection and Response Actions
Click the Actions tab to view the list of log collection and response actions for ServiceNow.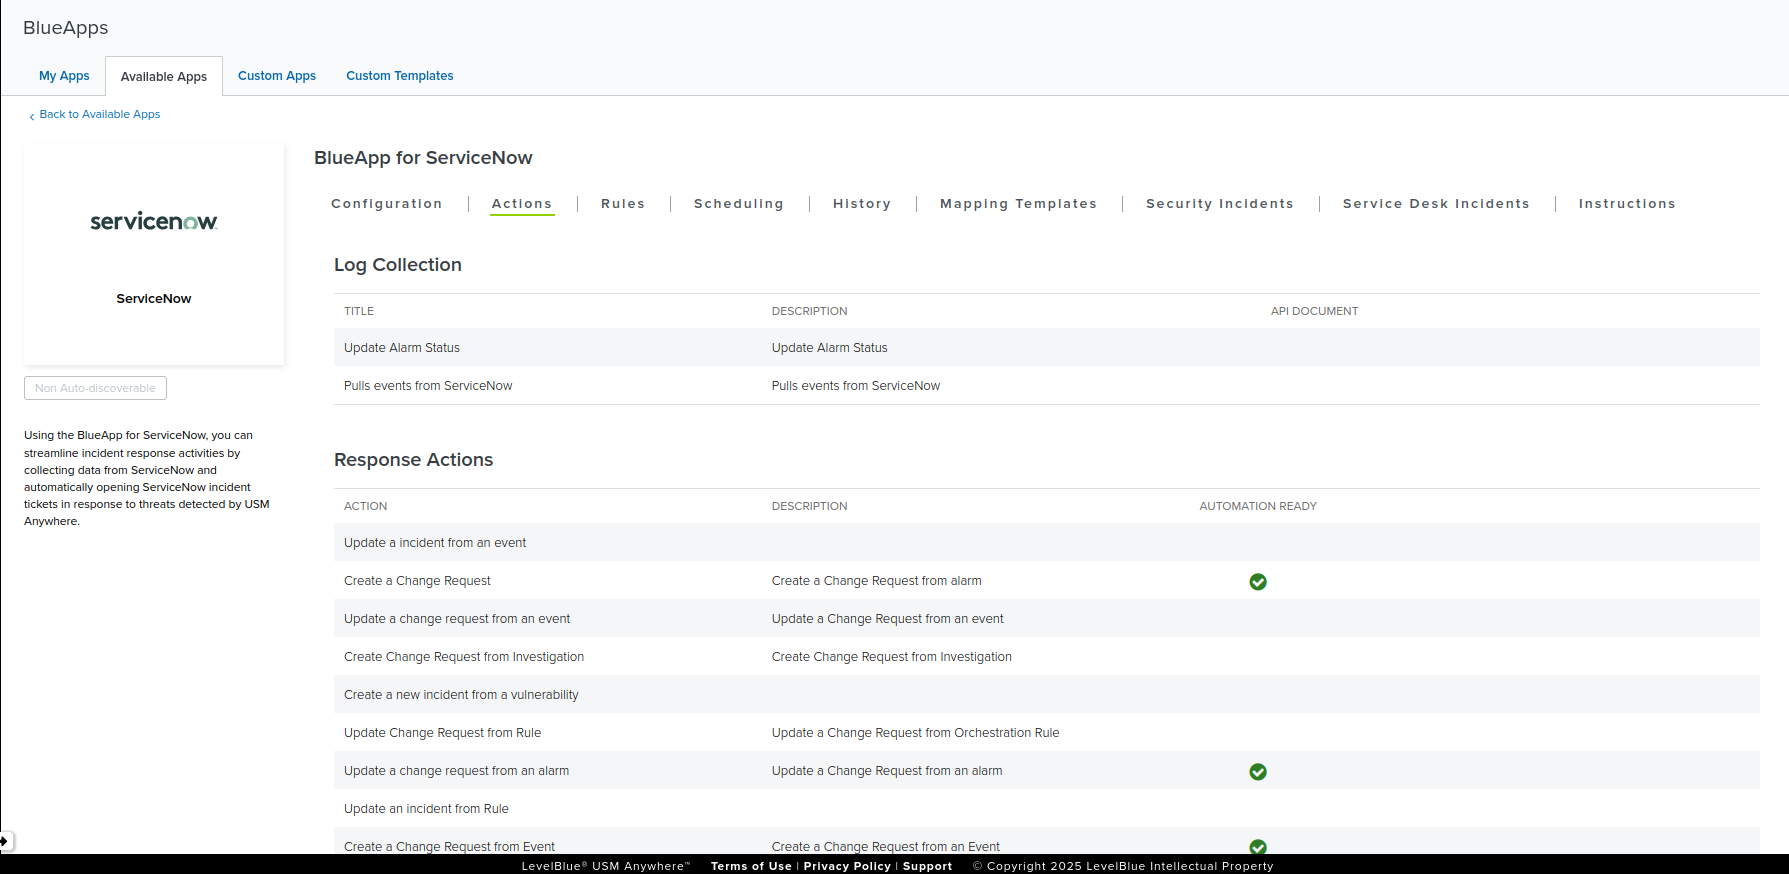
ServiceNow Event Collection
Once the BlueApp for ServiceNow has been configured, you can choose to have BlueApp for ServiceNow collect events from the app. ServiceNow logs and events are scheduled to be collected every five minutes by default. To configure ServiceNow event collection- Go to the Scheduling tab.
- In the Job Scheduler section, search for the ServiceNow app on the sensor to which it is deployed.
- In the Enabled column, switch the
 toggle for the inactive ServiceNow events job. This turns the toggle to green
  , and enables the event collection from ServiceNow based on the indicated schedule.

You can modify the scheduler iterations and other details, if necessary. Click the edit icon  to make and save your changes on the Edit Job dialog box.
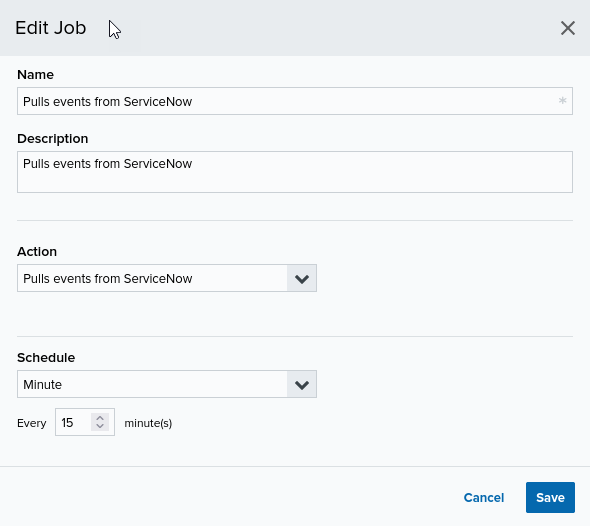
Update Alarm Status (Change Request Sync)
In the Scheduling tab > Job Scheduler section, a scheduler is also added to sync alarm and investigation statuses based on the ServiceNow Change Request updates. These Change Requests are updated every two minutes by default.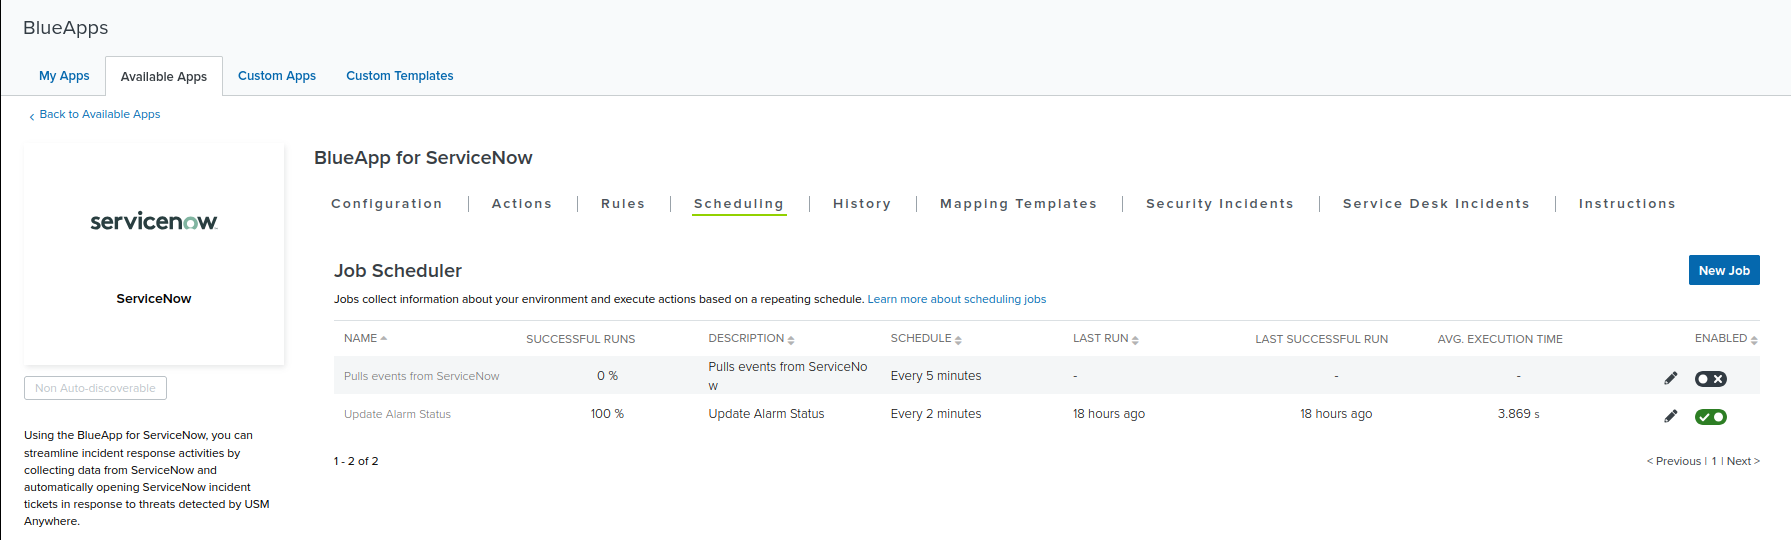
/api/now/table/change_request) to fetch newly created or updated Change Request records. The response is then processed to extract the associated Alarm IDs and Investigation IDs, as well as their corresponding status. All of which are updated in USM Anywhere.
Change Requests that are acknowledged, updated, assigned, or closed in ServiceNow are reflected in the platform’s alarms and investigations.
The scheduler stores the last run timestamp and uses incremental querying (
sys_updated_on >=last_run_time) to avoid processing duplicate records. Pagination is also applied to ensure all updated records are retrieved from ServiceNow.Scheduler Requirements, Sync Window, and Data Formats
Both schedulers must have the following ServiceNow configuration parameters to authenticate and fetch the relevant data from ServiceNow APIs:- ServiceNow Host URL
- Username
- Password / OAuth Token
- Table List (for Event Scheduler)
- Change Request Last Synced Time (auto-managed)
- On the first run after configuring or resetting ServiceNow for BlueApp, the Change Request scheduler fetches all Change Requests that have been updated within the last 1 day.
- For subsequent runs, the scheduler uses the last successful sync timestamp to fetch new or updated Change Requests only.
- The event scheduler runs independently and fetches all event and log data from the configured tables every five minutes.
- ServiceNow APIs return as JSON responses.
- The event data is presented in USM Anywhere event format, and then pushed to the Events page.
- Change Requests are parsed to extract alarm and investigation details before their statuses are updated.
Scheduler History
Click the History tab to view the list of successful and failed runs of the scheduler. If the scheduler run is successful, it shows a success message along with the number of fetched events. Otherwise, an error message is displayed.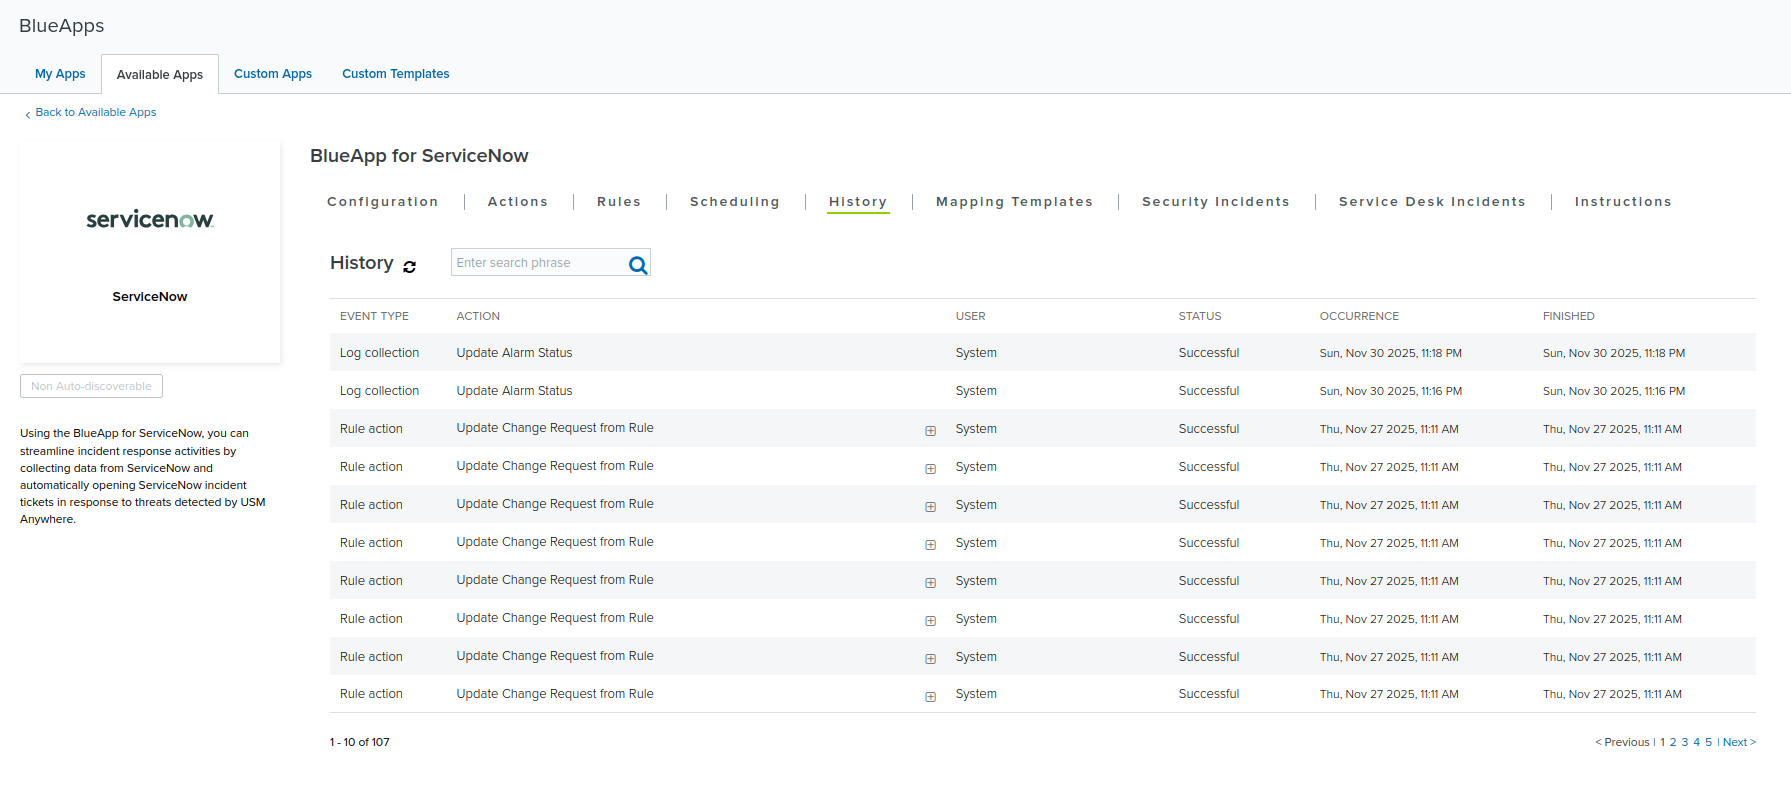
Configuring BlueApp for ServiceNow to Map ServiceNow Data Fields to USM Anywhere Data Fields
Once the BlueApp for ServiceNow has been configured, you can choose to create templates to map your ServiceNow fields to their equivalent data fields in USM Anywhere. When users create incidents from USM Anywhere events or alarms, they will be able to select the appropriate template to ensure that the USMA fields and ServiceNow fields will accurately reflect the incident’s information. See Creating ServiceNow Response Action Rules for more information on including these templates in your incidents. To map incident data in the BlueApp for ServiceNow- Open your BlueApp for ServiceNow and navigate to the Mapping Templates tab.
- Click the Add Template button.
- Enter a name for your new template.
- Use the dropdown rows to configure which USM Anywhere fields map to which ServiceNow fields. Add multiple rows to the same template with the Add Row button.
- Click Save when you are done configuring your mapping template.